ServiceNow
Route Cloud Management Platform (CMP) order requests through ServiceNow for approval using the ServiceNow Service Catalog integration
4 minute read
Configuring ITSM requires an admin user or a user with high-level permissions.
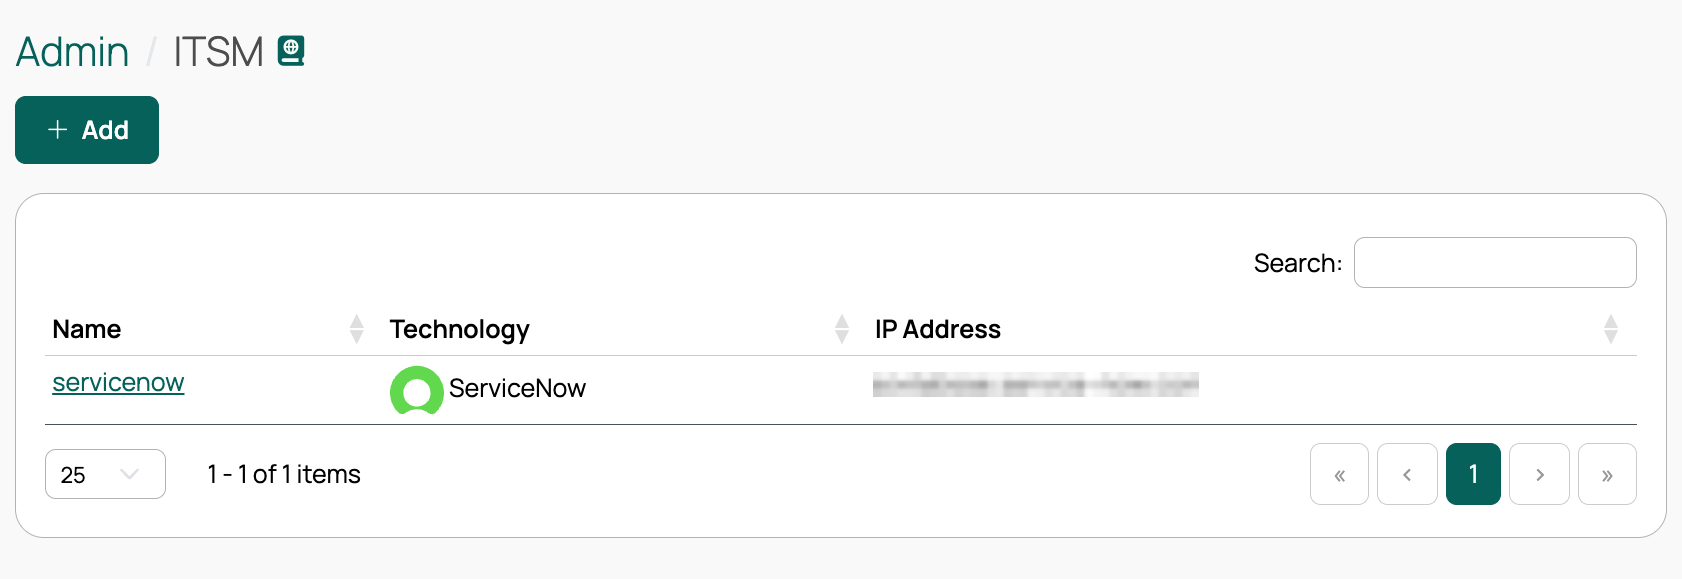
In CMP, go to Admin > ITSM.
Select Add.
Select ServiceNow.
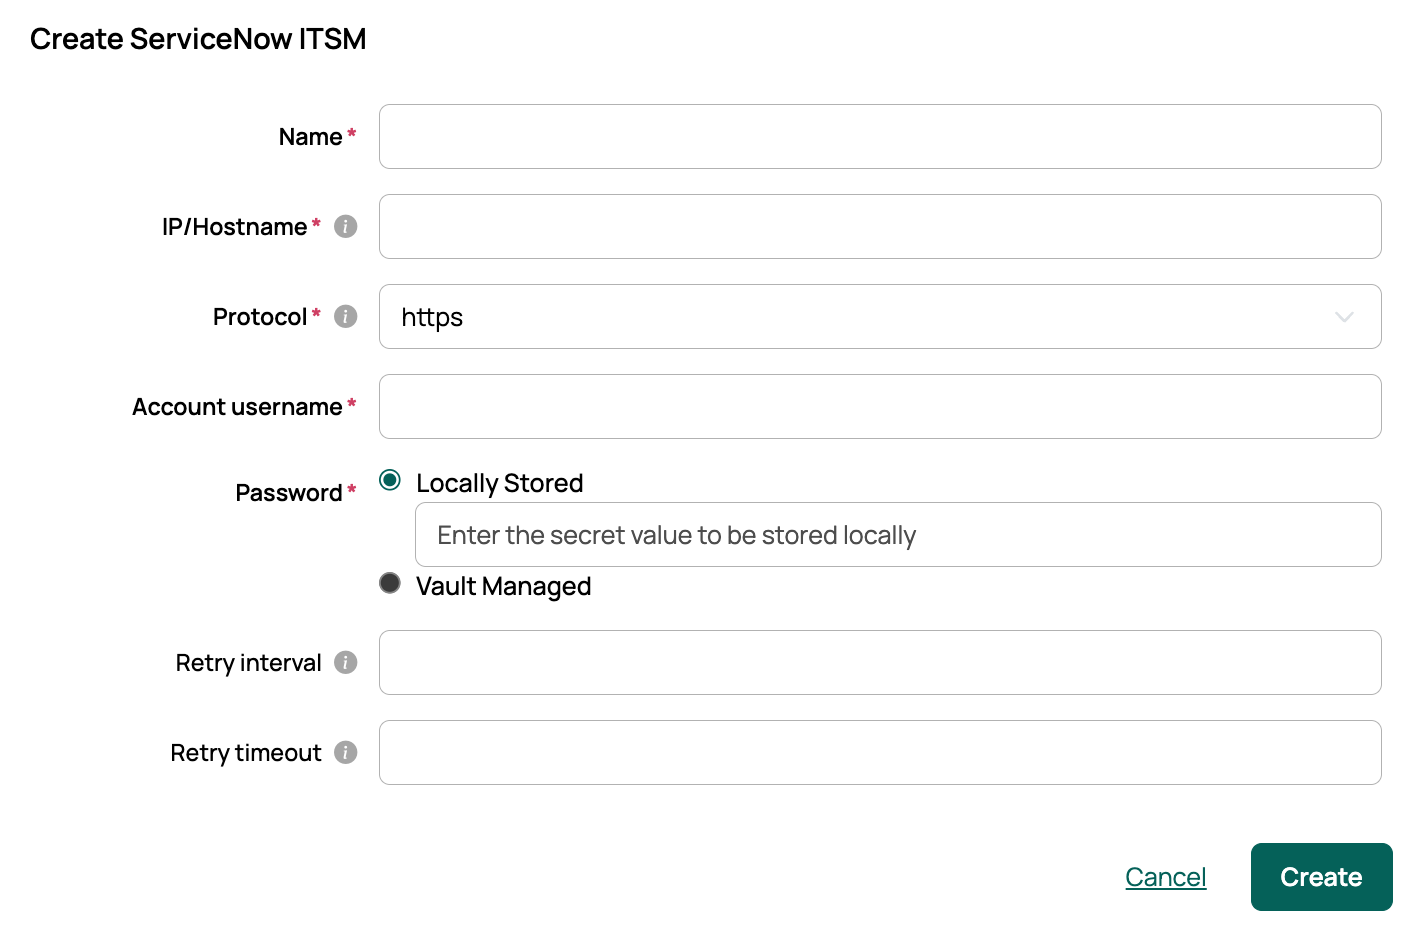
Complete the Create ServiceNow ITSM form:
| Field | Description |
|---|---|
| Name | Required. |
| IP/Hostname | Required. The address of your ServiceNow instance. |
| Protocol | Required. |
| Account username | Required. |
| Password | Required. If the password vault feature is enabled, this field offers Locally Stored or Vault Managed. Select Vault Managed to read the secret from a configured vault provider. See Use password vaults. |
| Retry interval and Retry timeout | Optional. How CMP retries requests to ServiceNow. |
Select Create. CMP creates the ServiceNow integration and makes its CMDB configuration available.
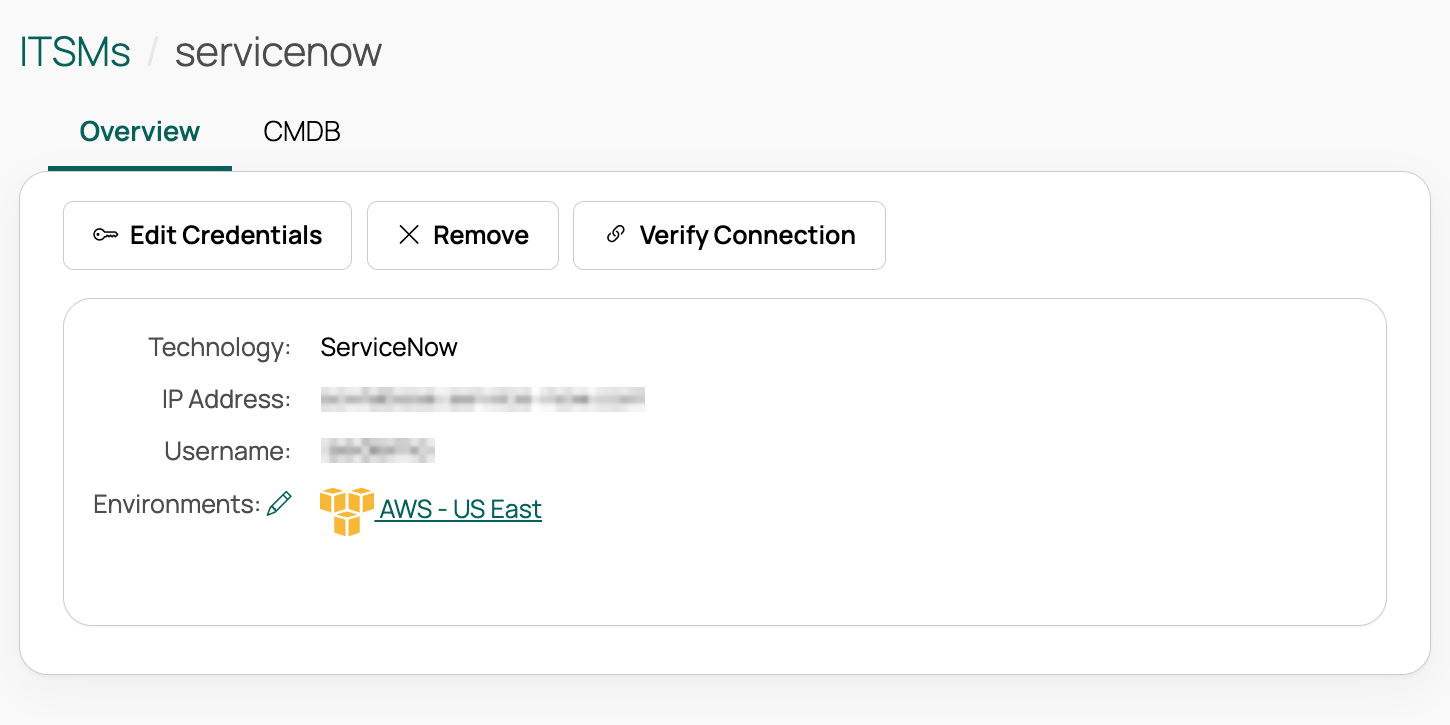
After you create the integration, CMP opens the Overview tab. From here you can edit credentials, remove the integration, or verify the connection to ServiceNow.
 (opens full-size image in a new tab)
Required: Add at least one environment from the Overview tab. The environments you configure here determine the data sets that CMP sends to ServiceNow when a server is provisioned.
The configuration management database (CMDB) must be enabled for the ServiceNow integration to function. When CMDB is enabled, CMP creates a configuration item (CI) in your ITSM instance’s CMDB for each newly provisioned server, and archives the CI when you delete the server.
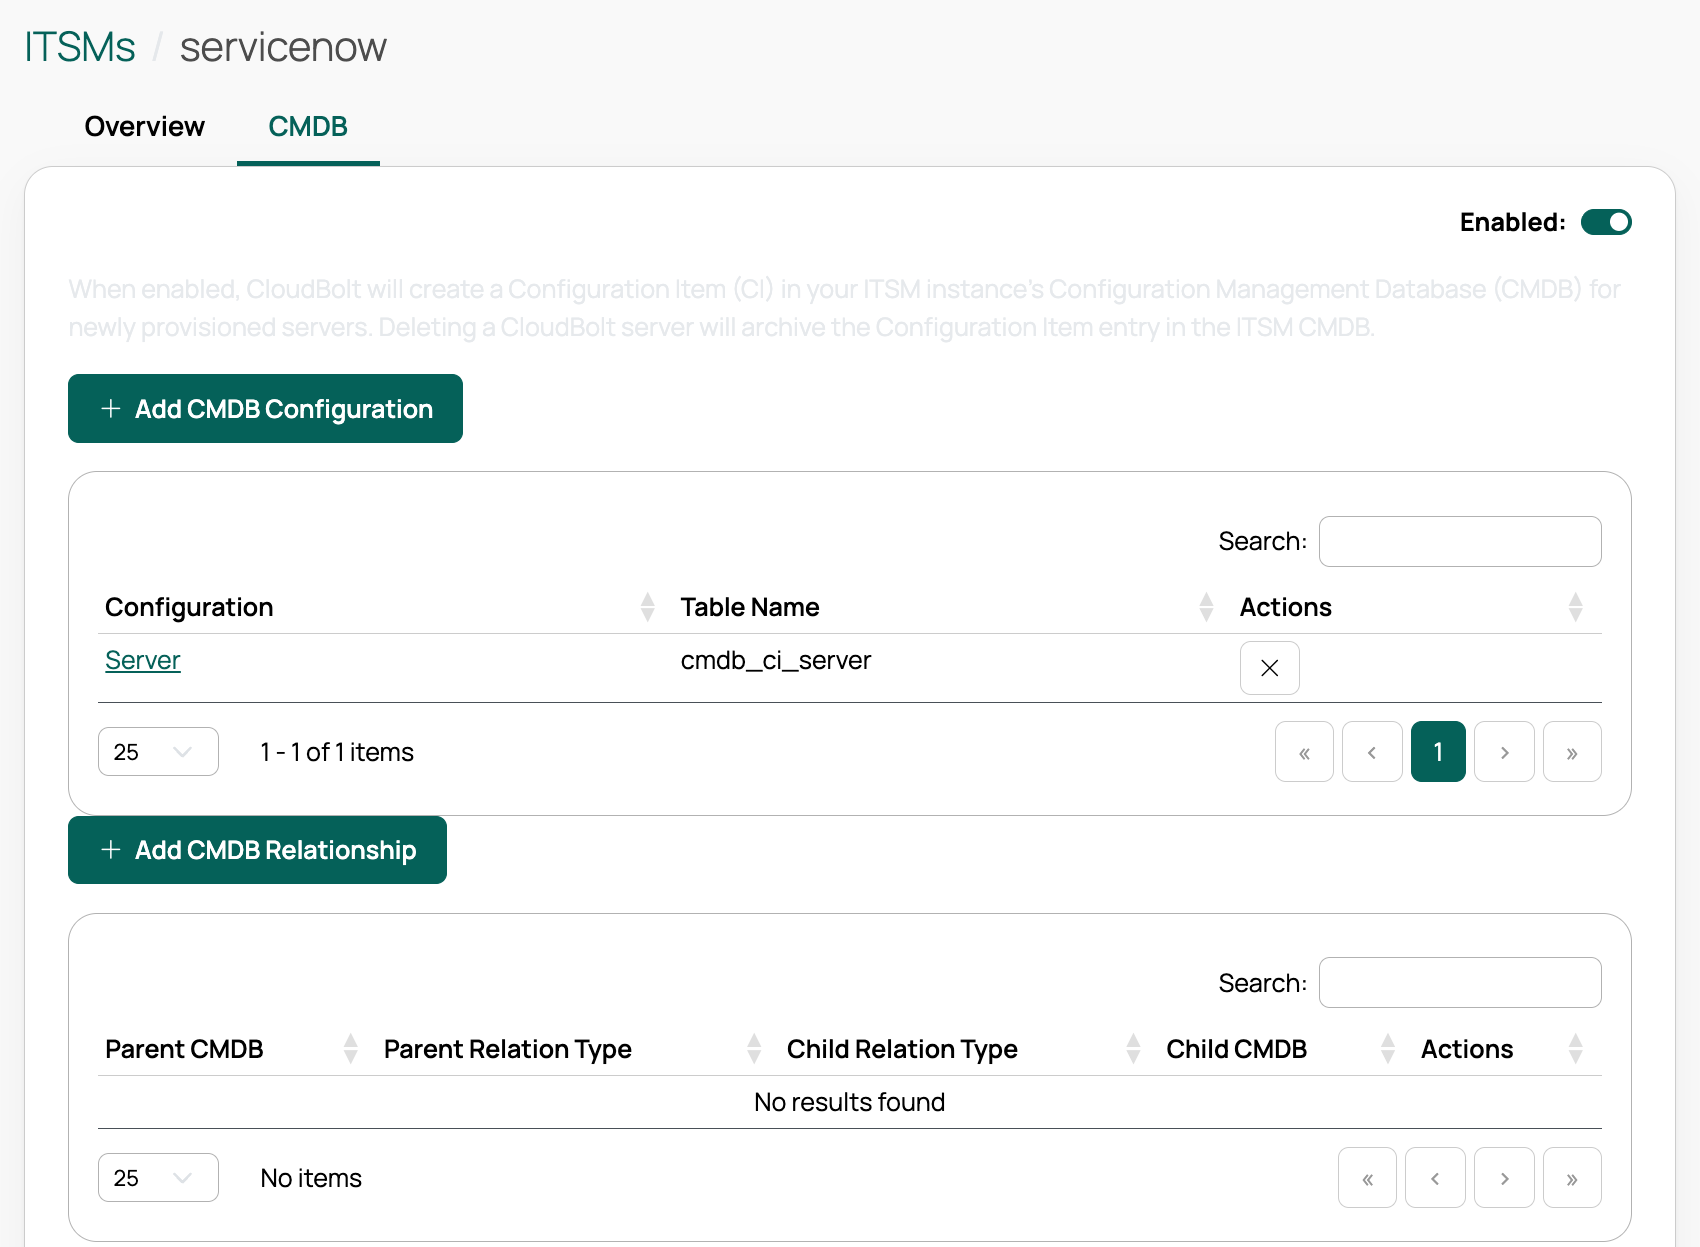
From an ITSM integration, select the CMDB tab.
Set the CMDB toggle to Enabled. CMP then sends server data whenever a server is provisioned, deleted, or otherwise modified.
Select Add CMDB Configuration. These steps also apply to Edit CMDB.
Enter the required values:
(Optional) Narrow the configuration by OS Build and/or Resource Technology. If you select neither, the configuration applies to any server in its environments that no other configuration matches.
(Optional) Select Always Create CI to use a configuration that has no OS Build or Resource Technology for every server in its environments, rather than only for servers that no other configuration matches.
Select Create. The configuration appears under the Configuration heading.
If a ServiceNow CMDB configuration existed before you configured CMDB with ITSM, CMP ignores the legacy ServiceNow CMDB plugin in favor of the ITSM ServiceNow CMDB configuration.
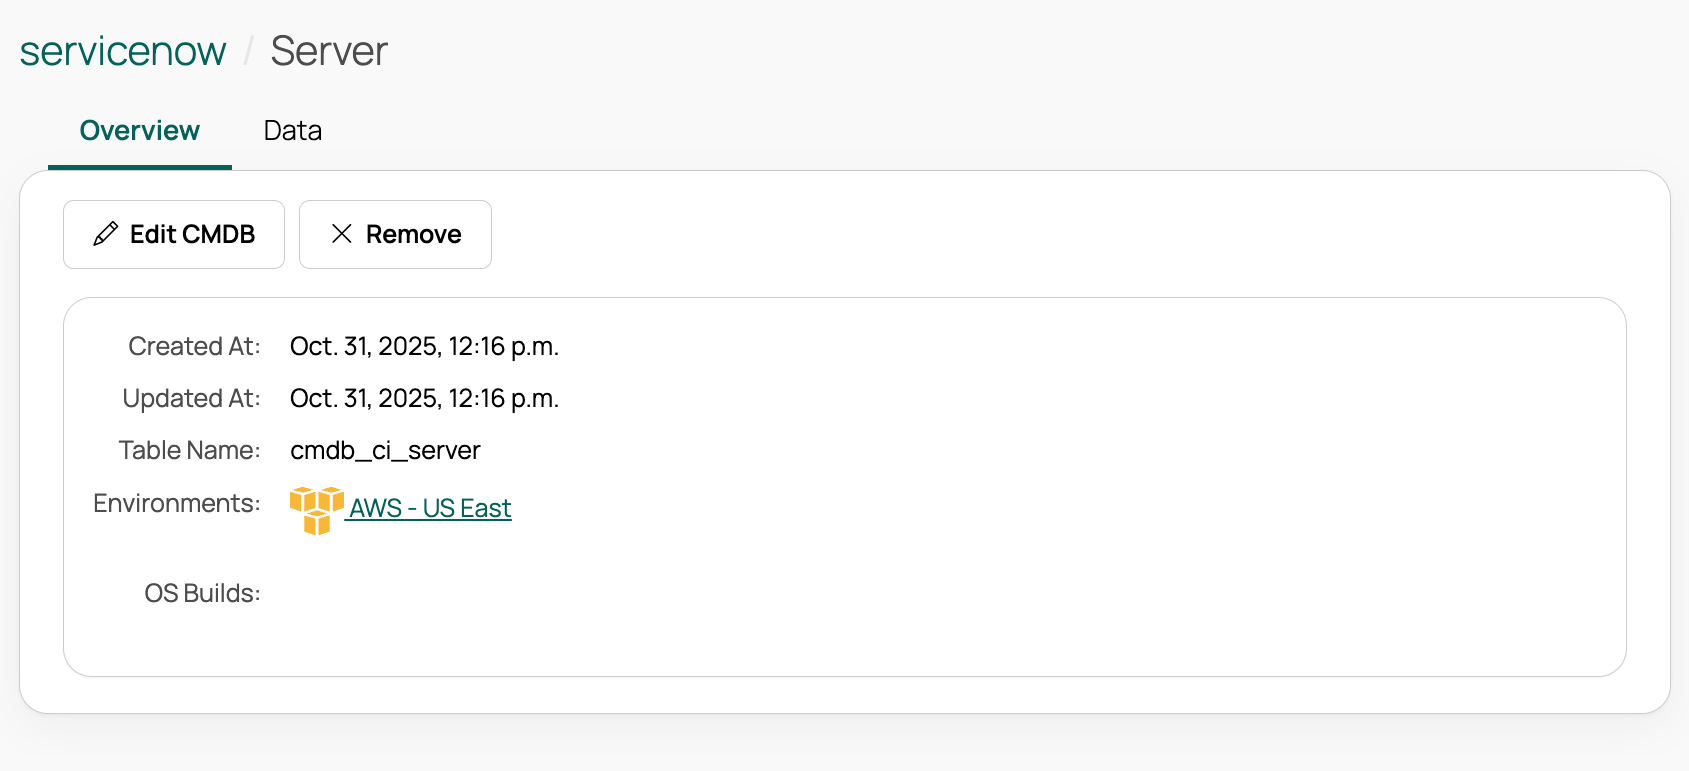
Select the configuration name to open its Overview and Data tabs.
 (opens full-size image in a new tab)
Edit the CMDB configuration, remove it, or view the environment it uses.
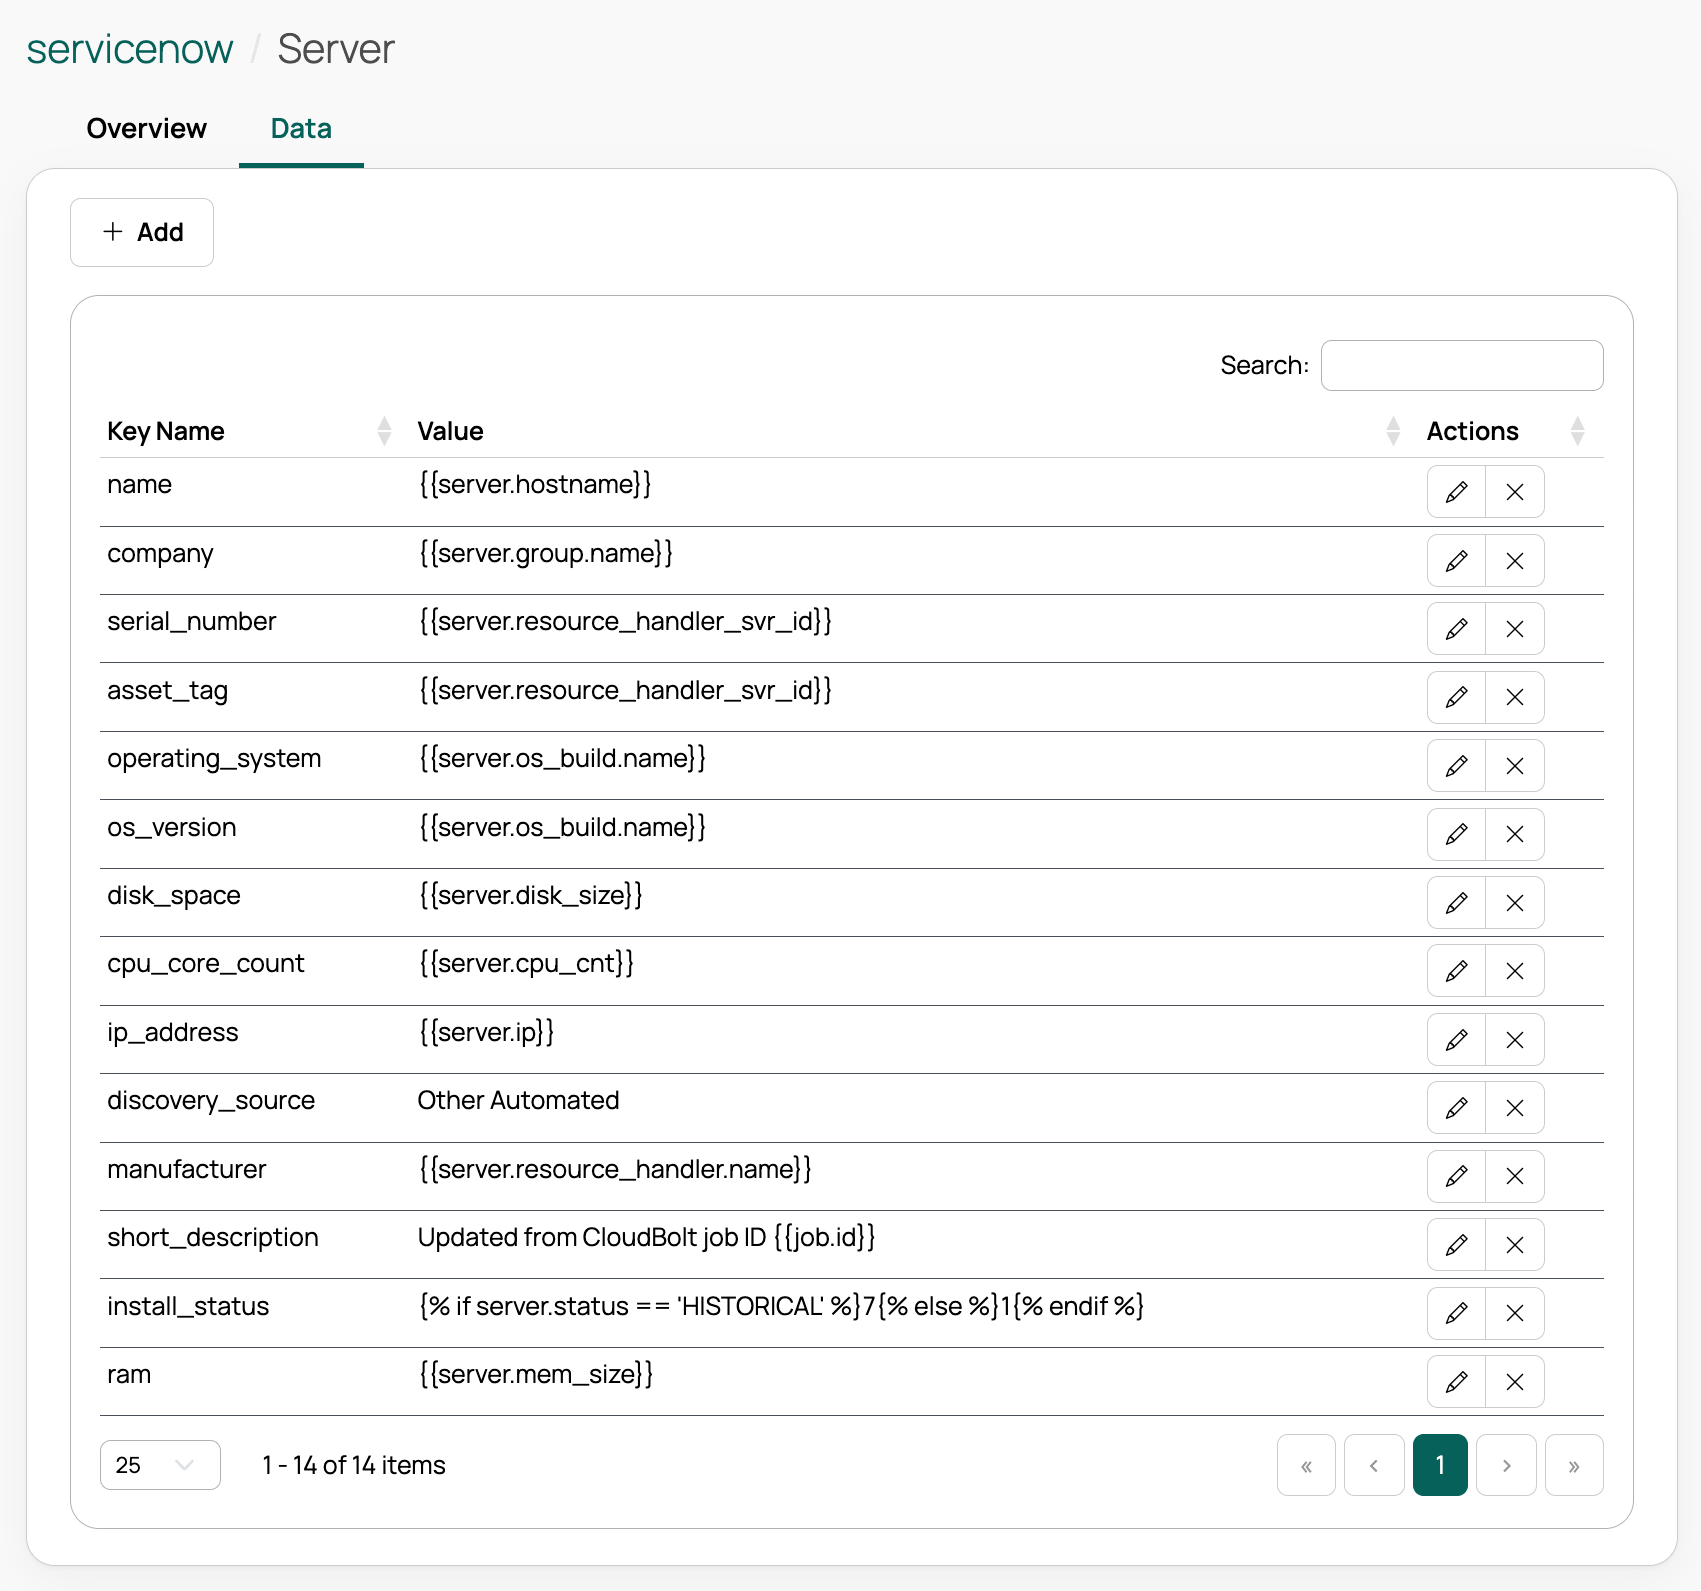
View and edit the data values that CMP sends to ServiceNow. Admin users can configure JSON payloads and ServiceNow endpoints for each environment and OS, and can expose server, job, environment, and group attributes with minimal coding.
 (opens full-size image in a new tab)
Define directional relationships between two CMDB configurations so that CMP creates linked CI records in the ServiceNow CMDB. For example, you can relate an application CI to its server CI.
Create at least two CMDB configurations before you add a relationship.
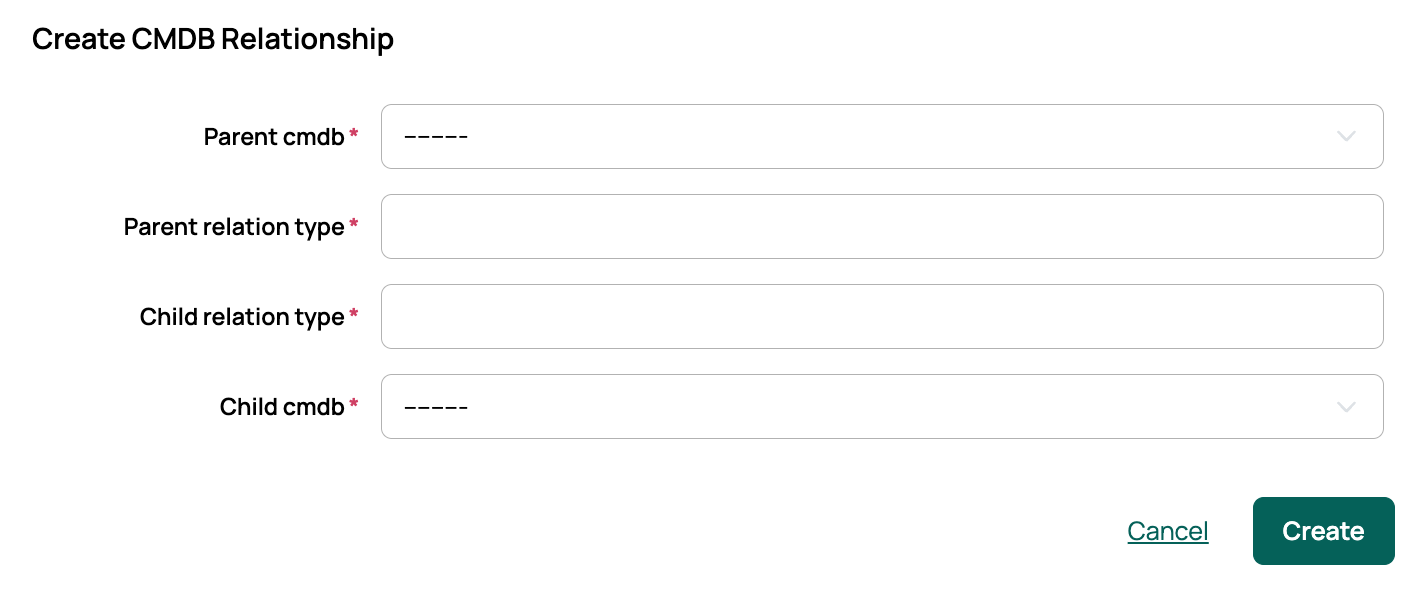
On the CMDB tab, select Add CMDB Relationship.
Select the Parent CMDB and Child CMDB configurations.
Enter the Parent relation type and Child relation type labels for the two sides of the association, for example, Runs on and Hosted by. Use the relationship-type names your ServiceNow CMDB expects.
Select Create. The relationship appears in the CMDB relationships table, where you can edit or delete it.
CMP applies these relationships when it creates or updates the CIs in ServiceNow, so the linked CI records reflect the parent/child associations you defined. A relationship is applied only when both of its configurations apply to the server being provisioned. If a server matches one side but not the other, CMP creates the CIs without the link.
Route Cloud Management Platform (CMP) order requests through ServiceNow for approval using the ServiceNow Service Catalog integration
Embed Cloud Management Platform (CMP) in your ServiceNow instance using an iframe, so users can work in CMP without leaving ServiceNow
Hold Cloud Management Platform (CMP) orders for approval in ServiceNow, so an order is provisioned only once a ServiceNow approver has signed it off