Set up Microsoft Teams to use multi-channel alerts
3 minute read
Prerequisites
- Set up or identify the Microsoft Teams channel for Cloud Management Platform (CMP) alerts.
- Log in to the Microsoft Teams application.
Quick setup
- Create a new workflow in Microsoft Teams on the desired team.
- Copy the URL from the workflow.
- Create a Microsoft Teams alert channel in CMP.
- Enter the URL copied from the workflow.
Create a workflow in Microsoft Teams
-
In your Microsoft Teams application, select the channel you want to receive alerts. You can also create a new team and channel for the alerts.
-
On the channel, select the ellipsis menu […].
-
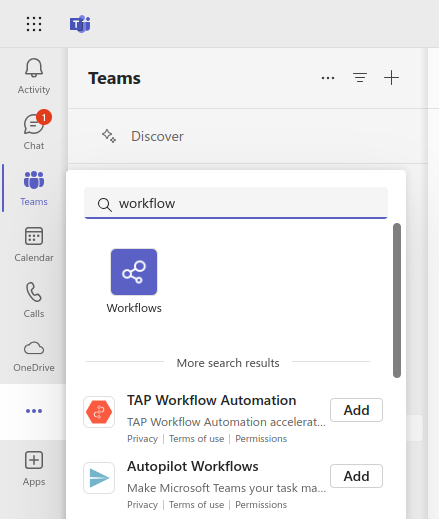
In the search field, type Workflows, or select + Apps and type Workflows in the search bar. The search results are displayed.
-
Find the required workflow and select its Add button.
-
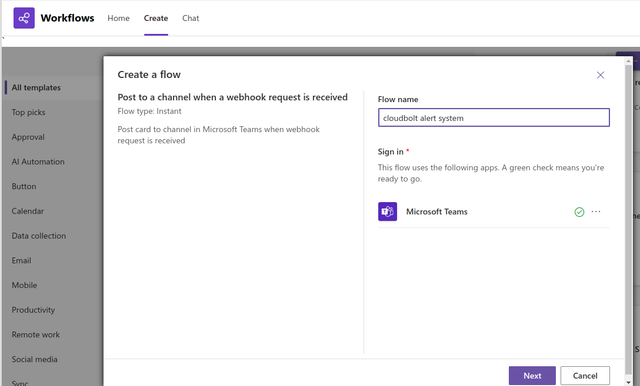
Select the template Post to a channel when a webhook request is received.
-
Enter the flow name, for example “Cloudbolt Alert”. Select Next.
-
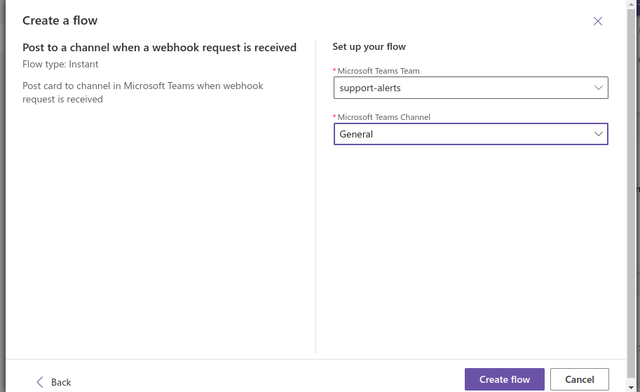
Select the Microsoft Teams team and channel as required.
-
Select Create a Flow.
-
Your workflow is created. You can run it by making a POST request to the displayed URL.
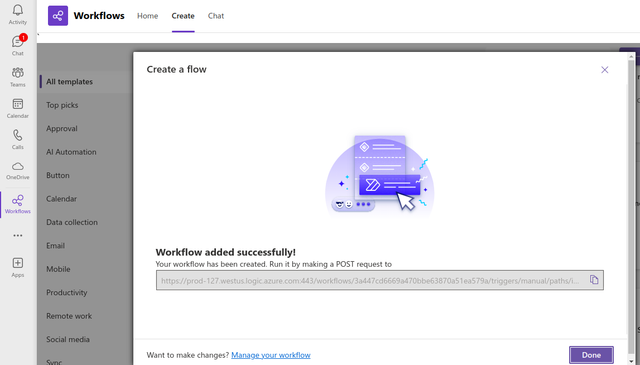 (opens full-size image in a new tab)
Copy the URL. You use this URL in the multi-channel alert channel in CMP.
-
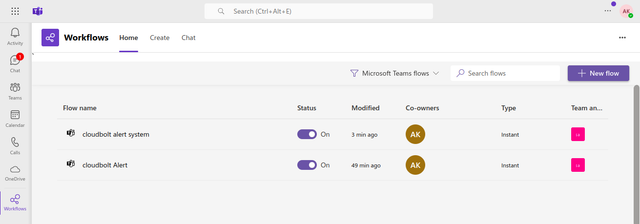
Select Done. The flow name is displayed in the workflow home dashboard:
-
Select the created flow name, for example “Cloudbolt Alert”, then select the edit icon (upper left) to update the workflow.
-
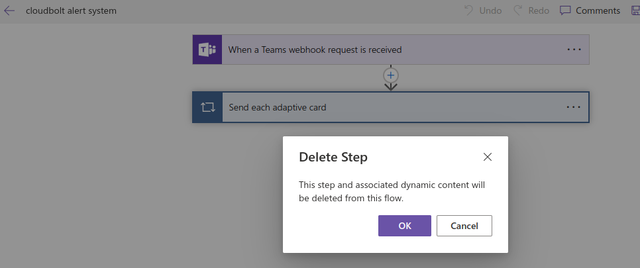
On the edit page, you may see two steps. The first contains the workflow URL you use in CMP. Do not remove the first step; it is required. The second step is the action to take for this workflow.
-
Remove the action by selecting the ellipsis (…) and selecting Delete.
-
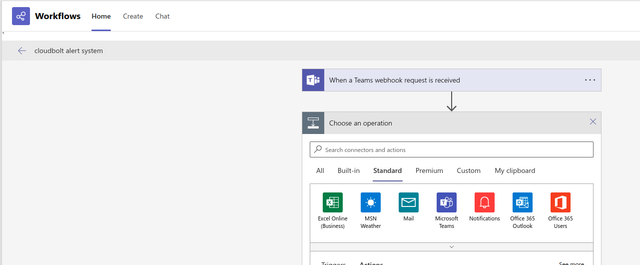
Select New steps > Standard > Microsoft Teams > Post a message in a chat or channel.
-
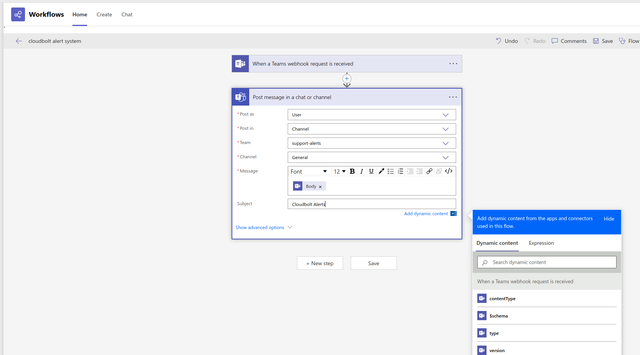
Fill out the form as follows:
- Post as: user
- Post in: Channel
- Team: the team you created or selected in step 1. Example: support-alerts
- Channel: the channel from step 1 you want to receive alerts. Example: General
- Message: select Body from dynamic content
- Subject: a subject for your alert
-
Select Save.
-
Use the URL you copied in step 9 in CMP.
-
You can also see the alert status in Teams. Go to Workflow > Home > flow name, then scroll down.
Create a Teams alert channel in CMP
- In CMP, select Admin > Multi-Channel Alerts > Add.
- Select Microsoft Teams.
- In the New Alert Channel - Microsoft Teams dialog, enter the following:
- A name for your alert.
- The Incoming Webhook URL you copied in Create a workflow in Microsoft Teams, step 9.
- Alert Categories. The built-in categories are cloudbolt.admin and cloudbolt.security.
- Select Create.
Outcomes
Test the integration by logging out of CMP and back in. A message should be sent to the designated Microsoft Teams channel.