Authenticate with Roles Anywhere
4 minute read
Cloud Management Platform (CMP) presents a client certificate to the Roles Anywhere API and receives temporary credentials in return, valid for one hour. CMP requests new credentials each time it connects. Nothing long-lived is stored in CMP, which suits a multi-tenant deployment where you want to share the resources in an account without sharing its keys.
What you set up first
Four things must exist in AWS before you add the handler, each of which produces a required value. Work through them in order.
- A Roles Anywhere role, which gives you the Roles Anywhere ARN.
- A profile that names the roles a client may assume and provides the Profile ARN.
- A client certificate and its key, in PEM format.
- A trust anchor holding the CA that signed that certificate, which gives you the Trust Anchor ARN. The profile and the trust anchor must be created in the same region.
Create the role and profile with CloudFormation
A CloudFormation template creates the role, its policy, and the profile in a single pass and outputs both ARNs. This replaces the two sections that follow.
- Download CloudboltRolesAnywhereSetupStack.json from CloudBolt Forge.
- In the AWS console, go to CloudFormation > Create stack > With new resources (standard).
- Select Upload a template file and upload the file.
- Enter a stack name and accept the defaults on the stack options page.
- Acknowledge that CloudFormation may create IAM resources with custom names, then submit the stack.
- On the Outputs tab, copy the profile ARN and the Roles Anywhere role ARN.
Create the role by hand
The role trusts the Roles Anywhere service, which allows the service to assume it and issue temporary credentials.
-
In the AWS console, go to IAM > Roles > Create role.
-
Select Custom trust policy and paste this policy:
{ "Version": "2012-10-17", "Statement": [ { "Effect": "Allow", "Principal": { "Service": "rolesanywhere.amazonaws.com" }, "Action": [ "sts:AssumeRole", "sts:TagSession", "sts:SetSourceIdentity" ] } ] } -
Select Next and attach a policy that grants the required permissions under AWS permissions.
-
Name the role and create it, then open it and copy the Role ARN.
Create the profile by hand
A profile names the roles a client may assume, and can narrow the permissions those roles carry. See Getting started with IAM Roles Anywhere in the AWS documentation.
- Go to the Roles Anywhere console and select Create a profile.
- Name the profile and, under Roles, select the role you created.
- Create the profile and copy its Profile ARN.
Generate self-signed certificates
If you do not have a CA, CMP can generate a root CA, a client certificate, and a client key, and package them as a certificate bundle. Run the command on the CMP appliance.
These arguments are required: country_name, state_name, locality, org_name, root_ca_name (for the root CA), and client_ca_name (for the client certificate). Quote any value containing spaces.
Two arguments are optional. Use email to send the bundle as an attachment, or use output_dir to write it to a directory on the appliance. Without either, the bundle is written to the default directory, /var/tmp.
To email the bundle:
sudo su -
/opt/cloudbolt/manage.py self_signed_certificate --country_name="US" --state_name="Maryland" --locality="Rockville" --org_name="Example-Company" --root_ca_name="Roles-Anywhere-Root-CA" --client_ca_name="Roles-Anywhere-Client-CA" --email="admin@example.com"
To save it on the appliance:
sudo su -
/opt/cloudbolt/manage.py self_signed_certificate --country_name="US" --state_name="Maryland" --locality="Rockville" --org_name="Example-Company" --root_ca_name="Roles-Anywhere-Root-CA" --client_ca_name="Roles-Anywhere-Client-CA" --output_dir="/var/tmp"
Create a trust anchor
The trust anchor represents the CA that signed your client certificate, either an AWS Certificate Manager private CA or your own.
- In the IAM console, go to Roles and select Manage under Roles Anywhere.
- Select Create a trust anchor and name it.
- For a CA of your own, select External certificate bundle and paste the contents of the root CA PEM file. Selecting an AWS Certificate Manager private CA may incur AWS charges.
- Create the trust anchor and copy its Trust Anchor ARN.
Create the handler
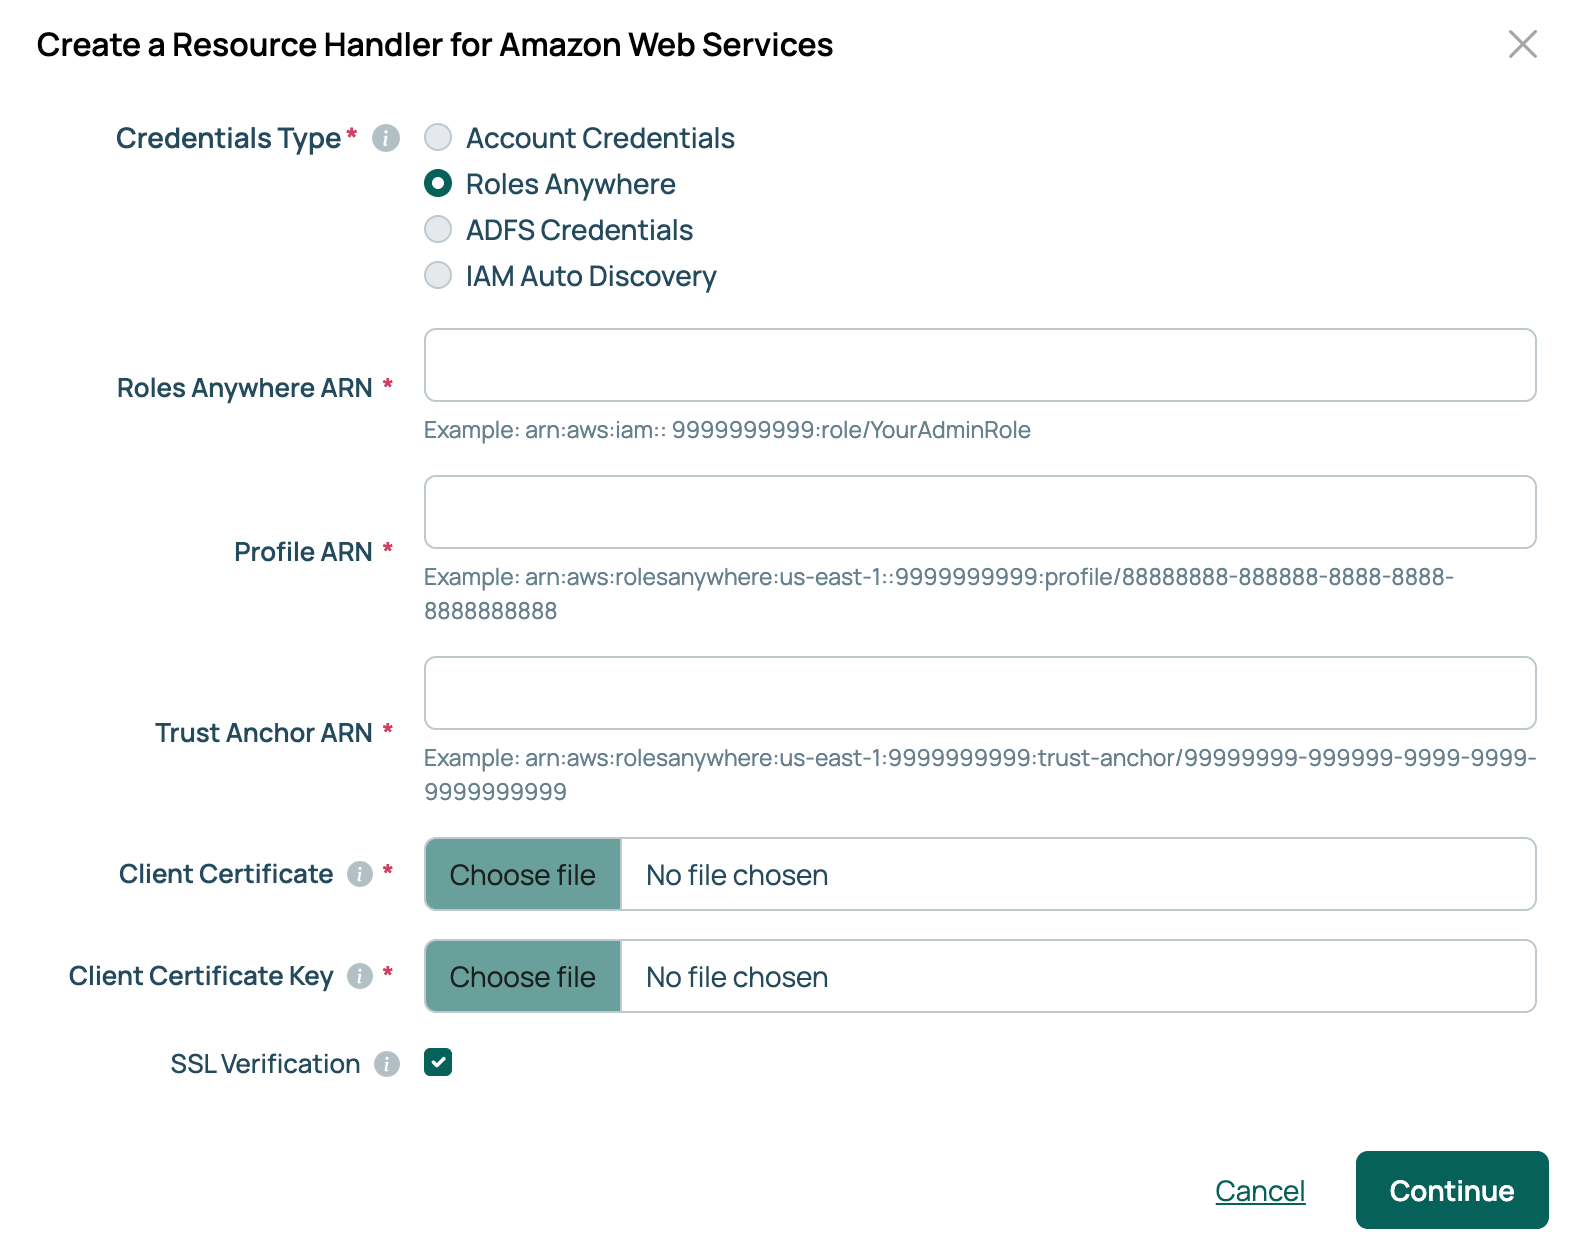
- Go to Admin > Resource Handlers and select Add.
- Select the Amazon Web Services tile.
- Set Credentials Type to Roles Anywhere.
- Enter the Roles Anywhere ARN, Profile ARN, and Trust Anchor ARN you collected.
- Upload the Client Certificate and the Client Certificate Key. Both must be in PEM format.
- Select Continue, then complete the handler’s settings and select at least one region, as described under Add an AWS resource handler.
 (opens full-size image in a new tab)
The three ARNs appear on the handler’s Overview tab. Use Verify Connection to confirm the certificate is accepted.
Related
- AWS: the other credentials types, and what an AWS handler needs permission to do.