PingOne for Enterprise identity provider
Set up single sign-on (SSO) for Cloud Management Platform (CMP) using PingOne for Enterprise
3 minute read
Before you begin
- Create at least one branded portal for this SSO provider. Its URL determines the metadata and ACS URL.
- Have an administrator account in PingOne for Enterprise that can create an application and add users.
- Have a PingOne organization.
PingOne also offers a similar product, PingIdentity SSO. CMP can integrate with it as well, but this guide covers PingOne for Enterprise specifically.
Set up PingOne in CMP
- In CMP, log in as an administrator.
- Select Admin > Single Sign-On (SSO).
- Select Add > Generic SAML Provider.
- Complete the SAML settings form, selecting the branded portal for this provider.
- Select Create.
- Copy and store the Single Sign-On URL and Metadata URL / Entity ID, and select Download Metadata XML. You use these later during PingOne setup.
Create the PingOne application
Connect to the PingOne directory
- Log in to the PingOne for Enterprise web interface.
- In the top navigation menu, select Setup > Identity Repository > Connect to an Identity Repository.
- For Connect to an Identity Repository, select PingOne Directory, then select Next.
- After the directory is configured, select Next.
- Make note of the Map Attributes; you use them later.
- Select Finished.
Add the PingOne SAML application
-
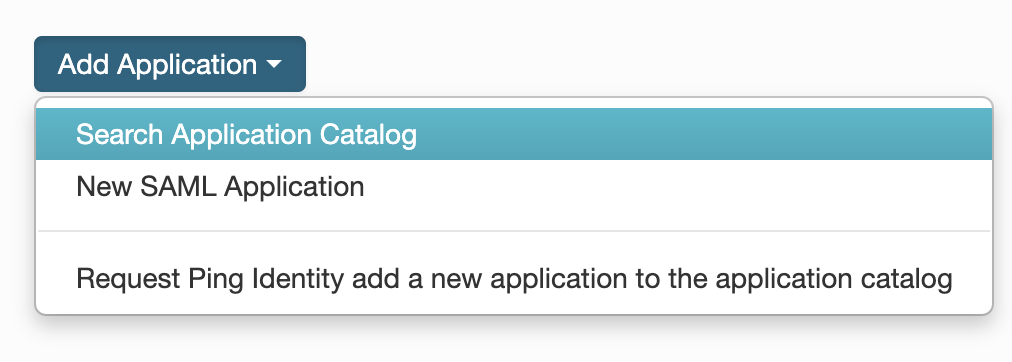
In the top navigation menu, select Applications > Add Application > Search Application Catalog.
-
Search for “Ping”, then select the arrow next to Ping IDaaS Directory Provisioner > Setup.
Selecting Setup opens PingOne’s configuration wizard. Complete each step:
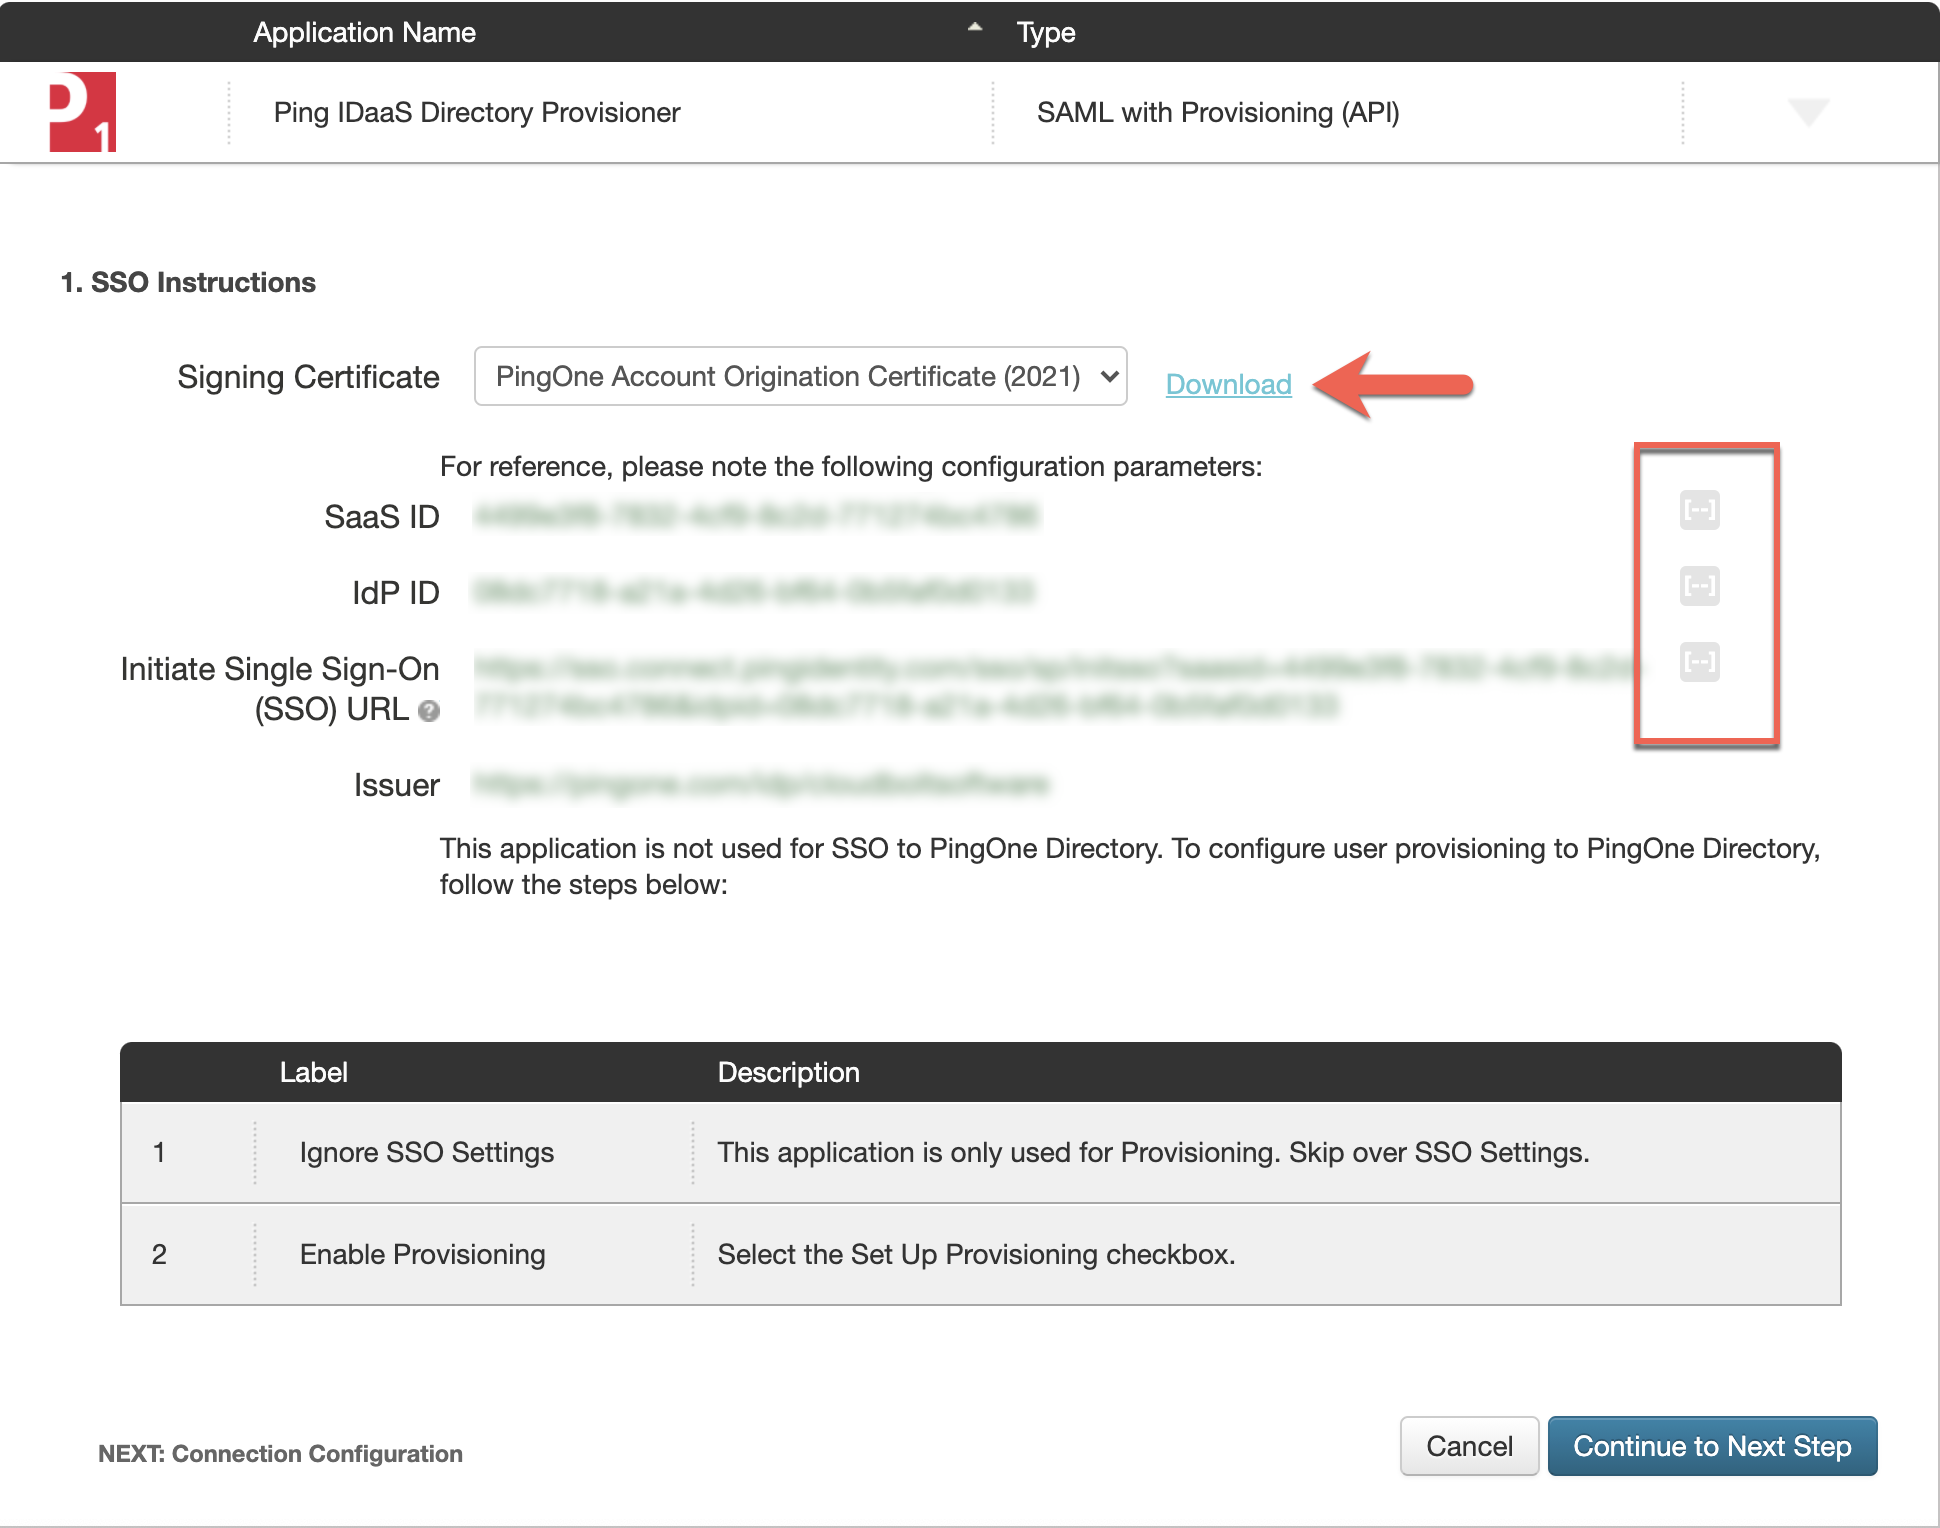
SSO Instructions
- Download the signing certificate.
- Copy and store the IDs, URL, and issuer for later use.
- Select Continue to Next Step.
 (opens full-size image in a new tab)
Connection Configuration
- Upload the Metadata URL you collected in Set up PingOne in CMP, step 6. The ACS URL and Entity ID fields populate from the metadata and should match your SSO provider in CMP.
- Select Continue to Next Step.
PingOne App Customization
- Optionally, change the PingOne app icon, name, description, and category.
- Select Continue to Next Step.
Group Access
- If you have groups, add them here.
- Select Continue to Next Step.
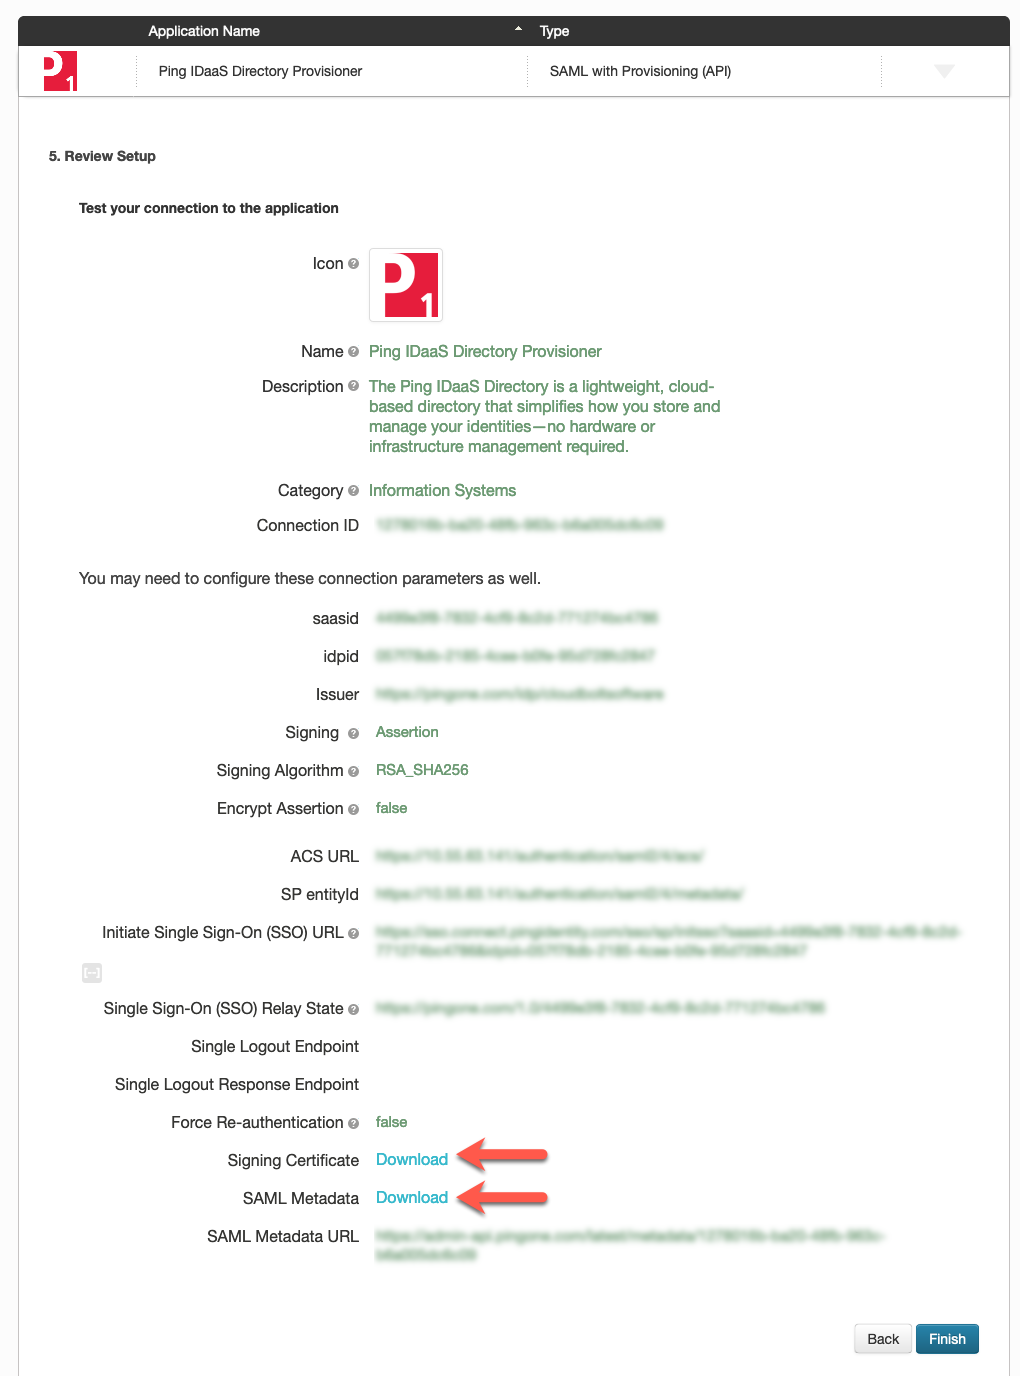
Review Setup
- Review the presented information.
- Copy and store the Initiate Single Sign-On (SSO) URL. You need it to test the connection later.
- Download the Signing Certificate and SAML Metadata.
- Select Finish.
 (opens full-size image in a new tab)
Upload the metadata to CMP
Return to your PingOne SSO provider in CMP to upload the XML metadata.
- In your PingOne SSO provider, select Upload IdP XML.
- Metadata Source: Metadata file
- Metadata File: Select the file you downloaded in the Review Setup step.
- To upload certificates, select Certificates.
Test the SSO connection
- In CMP, select Admin > Users and create a new user. Make sure the user’s group membership matches any group entered in PingOne setup.
- Go to the Initiate Single Sign-On (SSO) URL and log in with the new user account.
- If you are redirected to CMP and can log in, the SSO configuration is complete.