OneLogin identity provider
Set up single sign-on (SSO) for Cloud Management Platform (CMP) using OneLogin
3 minute read
Before you begin
- Complete Set up SSO and SAML and Configure the identity provider.
- Capture the IdP XML metadata.
- Create at least one branded portal for this SSO provider.
- Have a OneLogin administrator account that can create applications and add users.
- Have a OneLogin organization.
Add the OneLogin SSO provider in CMP
- Log in to CMP as an administrator.
- Select Admin > Single Sign-On (SSO).
- Select Add > Generic SAML Provider.
- Complete the SAML settings form.
You need the Single Sign-On URL and Metadata URL / Entity ID for the OneLogin application setup below.
Create the OneLogin application
In OneLogin, make sure you are in the Admin menu (https://<instance-name>.onelogin.com/admin).
- In the main navigation menu, select the Applications tab.
- Select Add App.
- In the search box, type “SAML Test” and search.
- Select SAML Test Connector (Advanced).
- Enter a Display Name for the app and ensure Visible in portal is checked.
Configure the SAML settings
Configure the SAML settings as shown below. Find the Metadata URL / Entity ID and Single Sign-On URL in CMP, on the OneLogin SSO provider’s Overview page (see Configure the identity provider).
| SAML setting field | Notes |
|---|---|
| Audience (EntityID) | Metadata URL / Entity ID in CMP. |
| Recipient | Single Sign-On URL. |
| ACS (Consumer) URL Validator | Single Sign-On URL. |
| ACS (Consumer) URL | Single Sign-On URL. |
| Single Logout URL | Leave blank. |
| Login URL | Single Sign-On URL. |
| SAML not valid before | 3 |
| SAML not valid on or after | 3 |
| SAML initiator | OneLogin |
| SAML nameID format | Unspecified |
| SAML issuer type | Specific |
| SAML signature element | Response |
| Encrypt assertion | Unchecked |
| SAML encryption method | TRIPLEDES-CBC |
| Send NameID Format in SLO Request | Unchecked |
| Generate AttributeValue tag for empty values | Unchecked |
| SAML sessionNotOnOrAfter | 1440 |
| Sign SLO Request | Unchecked |
| Sign SLO Response | Unchecked |
Select Save.
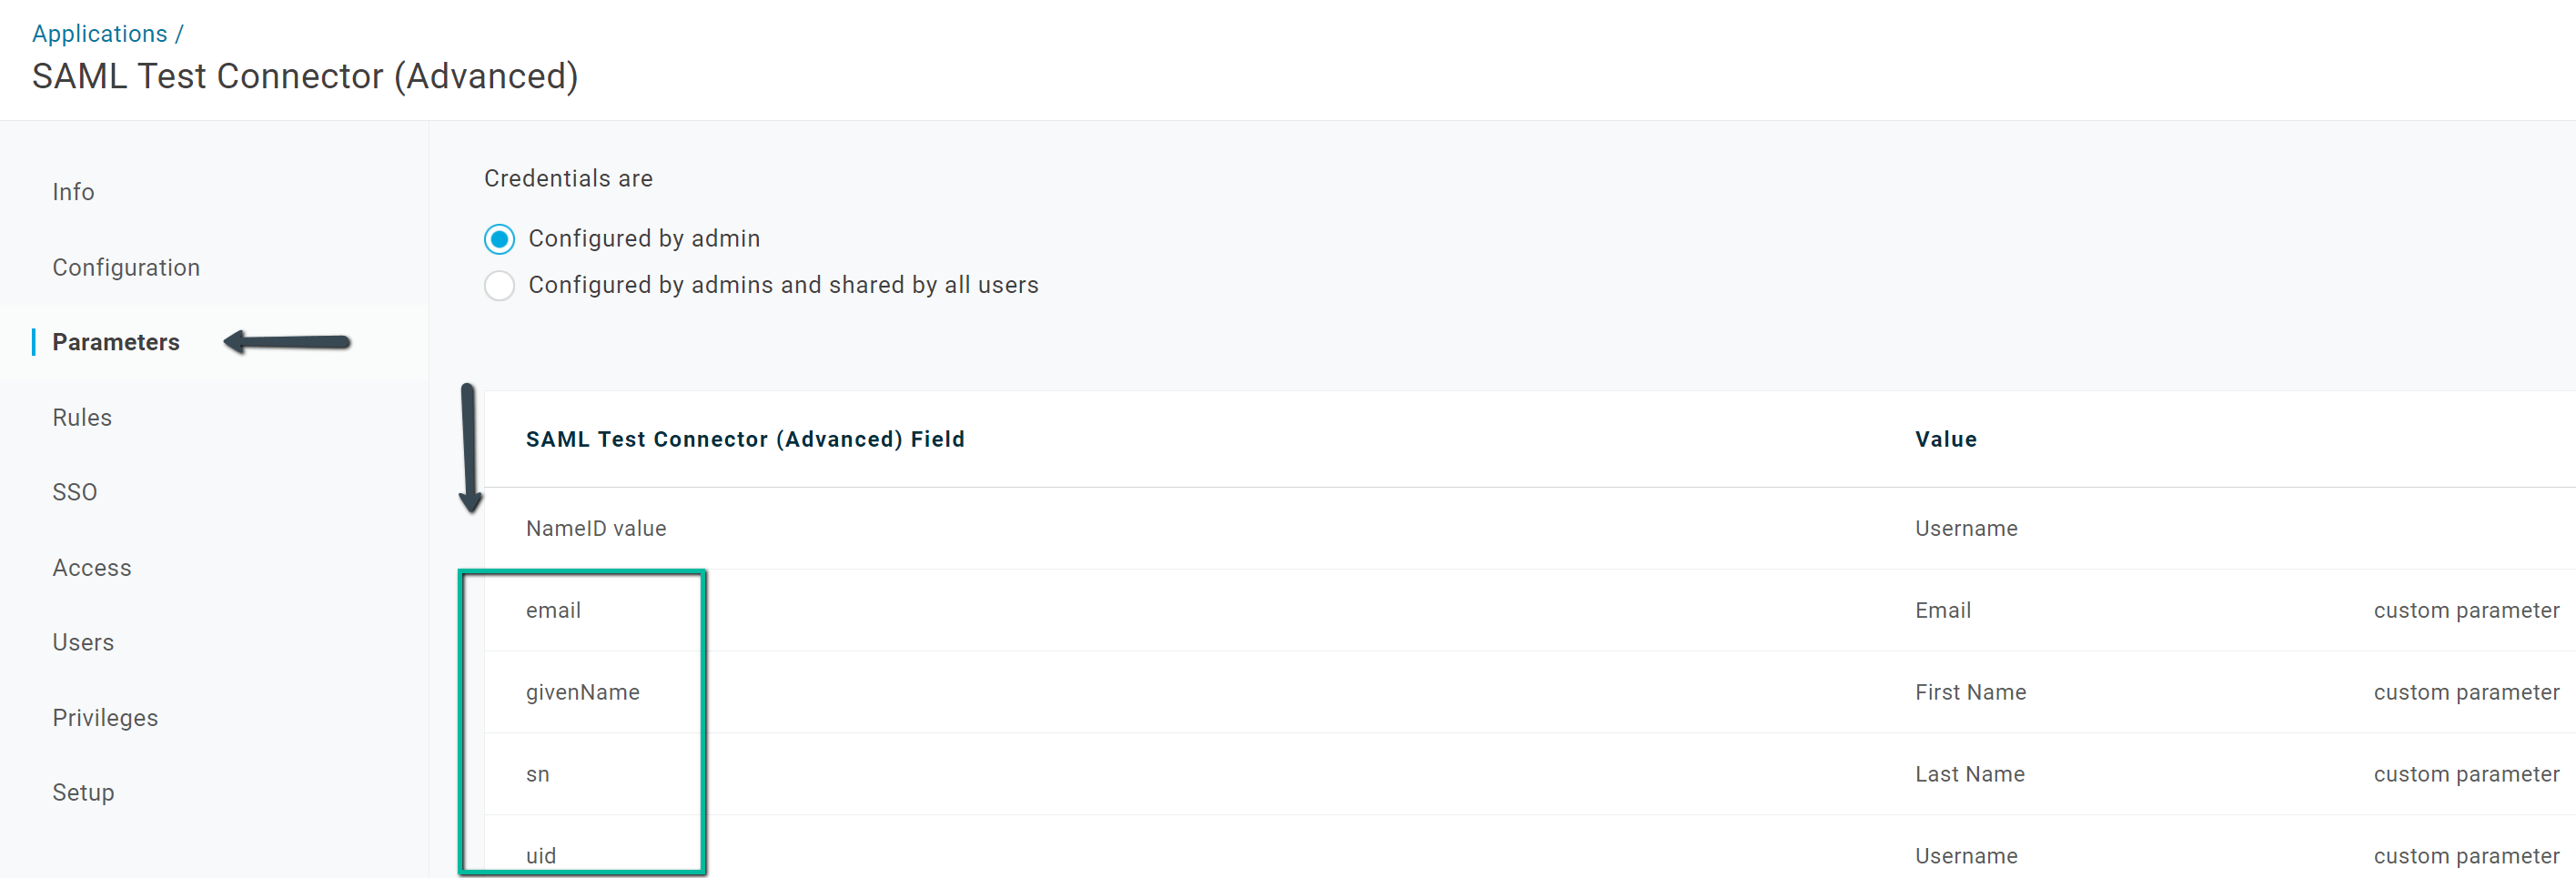
The name ID for the email, given name, surname, and user ID fields is specified as parameters within the application:
 (opens full-size image in a new tab)
Download the SAML metadata
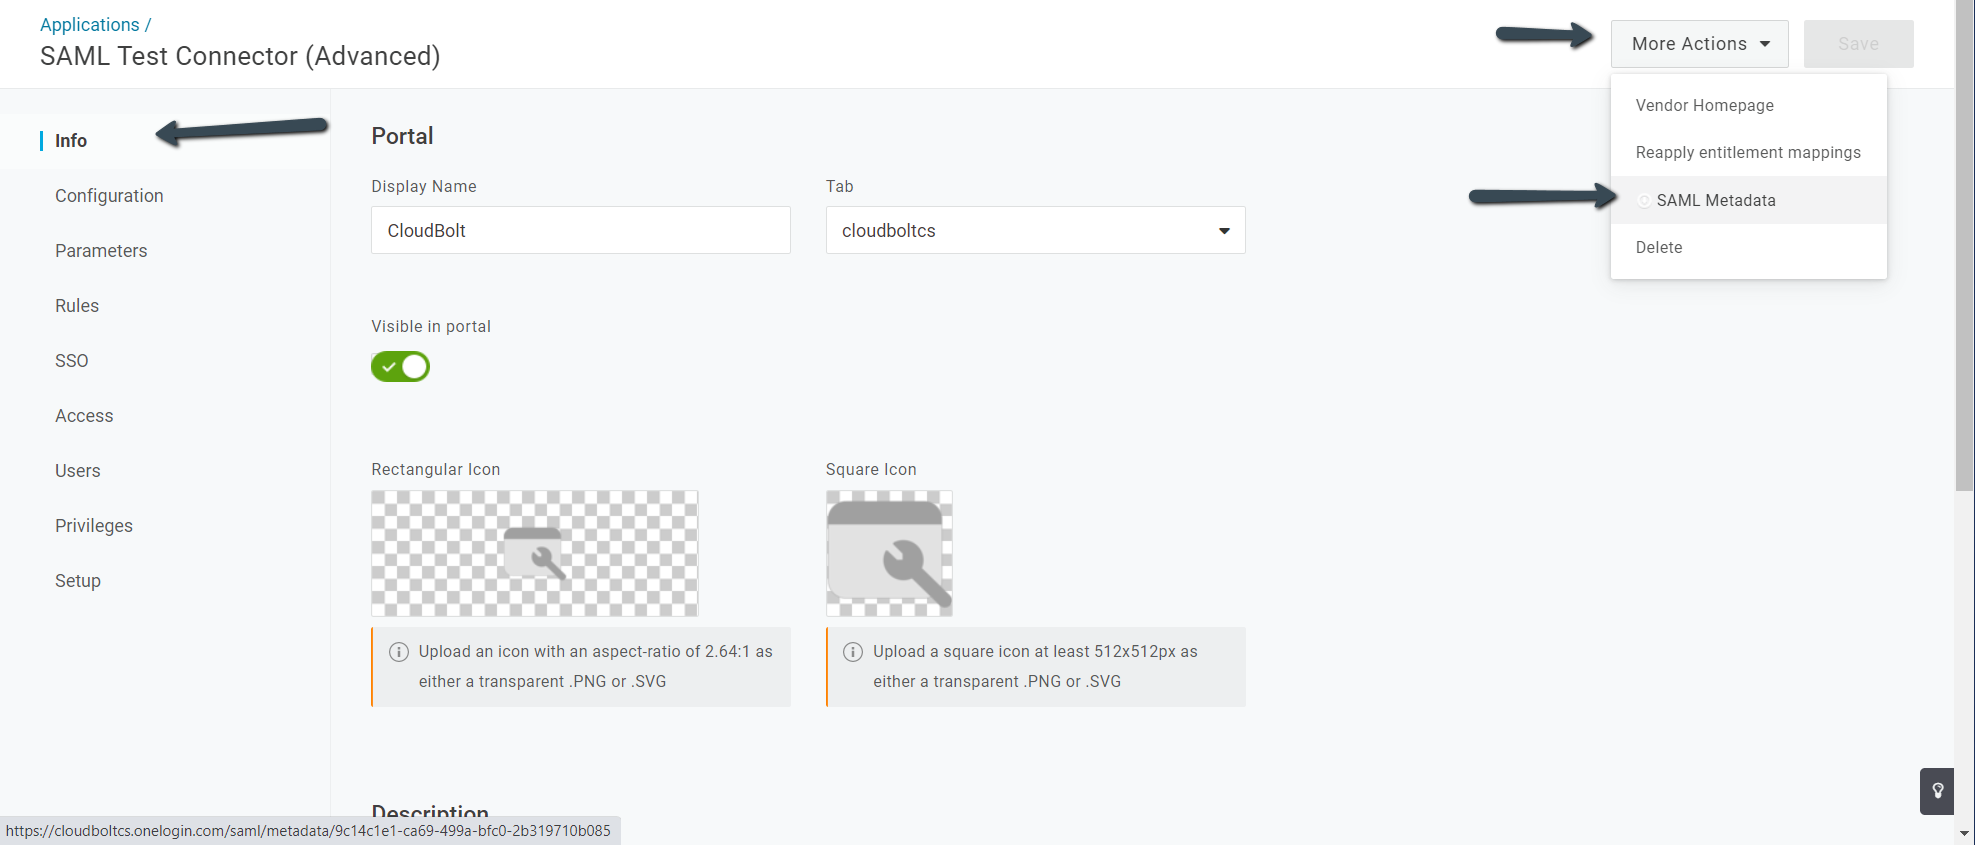
- On the new application, select the More Actions dropdown in the top right.
- Select SAML Metadata to trigger the file download.
 (opens full-size image in a new tab)
Assign user access
- In the main navigation menu, select the Users tab and select the user.
- In the left navigation pane, select Applications.
- Select [+] in the top right.
- Select the application and the role to assign access to the user.
- Select Save User.
Finish SSO setup in CMP
- Log in to CMP as a Super Admin.
- Go to Admin > Single Sign-On (SSO).
- Select OneLogin.
- Select Upload IdP XML, set Metadata source to Metadata File, and choose the XML file you downloaded in Download the SAML metadata.
- Select the Edit icon.
- If you did not choose one at setup, scroll to the Branded Portal dropdown and select a portal for OneLogin.
- (Optional) Enable auto-login:
- Select Admin > Miscellaneous Settings.
- Set Automatically Login to SSO to On.