Customize VMs during provisioning
7 minute read
Extending disks
CMP supports extending the primary disk at provision time for VMs of all OS family types on the VMware and GCP resource handlers. Other resource handlers, including AWS and Azure, do not currently support primary disk extension.
Extending Linux disks
To configure an environment to extend the primary disk on provisioning for Linux servers only:
- Add the Extend Primary Disk During Provisioning parameter (
extend_root_disk) to the environment and set its value to True. - Include the Disk Size parameter (
disk_size) either in a preconfiguration or as a parameter on the group or environment. This value represents the final size, in GB, of the primary disk.
On Linux servers, CMP extends the disk but does not extend partitions to fill the new space. Because of this, CMP does not need to interact with the OS to extend the disk. Extending partitions is the administrator’s responsibility after the server is provisioned.
Extending Windows disks
To configure an environment to extend the primary disk on provisioning for Windows servers:
-
Add the Extend Primary Disk During Provisioning parameter (
extend_root_disk) to the environment, group, or blueprint, and set its value to True. -
Set the Password parameter on the environment to match the template password. This value is not shown to users.
-
Include the Disk Size parameter (
disk_size) either in a preconfiguration or as a parameter on the group or environment. This value represents the final size, in GB, of the primary disk. The following image shows the preconfiguration setup:
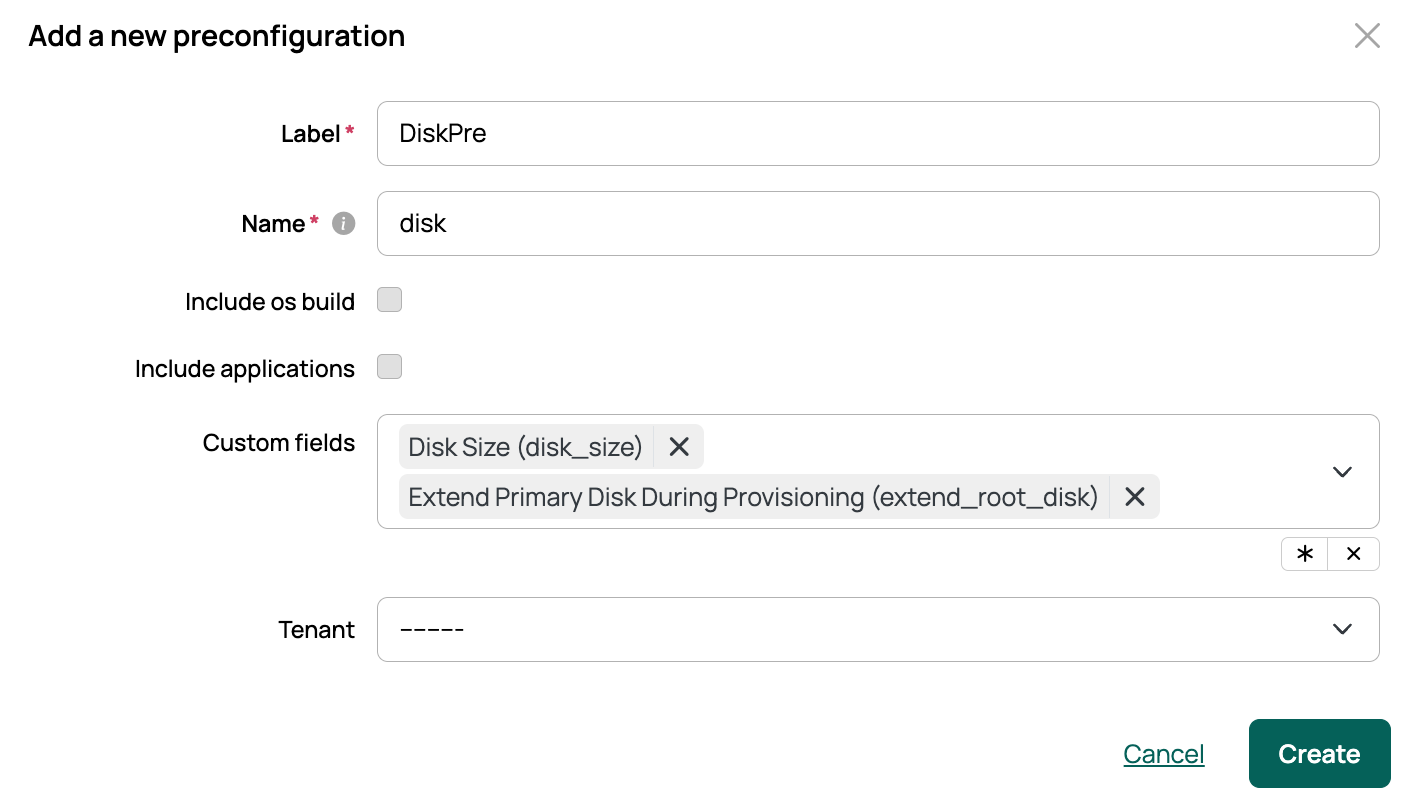
In addition to extending the disk hardware, CMP also resizes the C: partition for Windows. The extended disk must be labeled “Hard disk 1” in VMware and C: in the Windows template. The Password parameter is necessary for OS interaction.
Extending disks is not supported when provisioning a server as a VMware linked clone.
Adding additional disks
To let users add disks to a server during provisioning, add parameters that follow the Size for Disk 2 pattern to the group or environment. Each parameter’s value is the size of the additional disk in GB. The parameters for the second through fourth disks are built into CMP and ready to add. To add more than four disks (up to 15 on VMware), create additional integer parameters on the Parameters list page (via the Admin page), starting with the name disk_4_size and label Size for Disk 5 and following the pattern from there.
Additional disks have no partition or filesystem created automatically; create them after provisioning, directly from the OS.
To control where the second disk is placed or whether it is encrypted, create a custom parameter for the relevant provider:
| Provider | Parameter (2nd disk) | Label | Type | When not set |
|---|---|---|---|---|
| VMware | disk_1_datastore |
Datastore for Disk 2 | DiskStorage | Same datastore as the initial disk |
| Azure | disk_1_storage_account |
Storage Account for Disk 2 | String | The storage account selected for the provision, or a newly created one |
| AWS | disk_1_encryption |
Encryption for Volume 2 | Boolean | An unencrypted volume |
For later disks, increment the name index; for example, disk_2_datastore is Datastore for Disk 3, and disk_2_encryption is Encryption for Volume 3. Create these on the Parameters list page (via the Admin page). Like any parameter, they can be constrained, given particular options, left open, or included in a preconfiguration.
A few provider notes: for VMware, additional disks inherit the initial disk’s provisioning type, and a datastore value can also be a comma-separated list; valid Azure storage accounts appear on the environment’s Azure Parameters tab. For AWS, an additional disk is created in the same availability zone as the instance (the two must match for it to attach), and the root volume follows the AMI’s encryption unless you add the aws_volume_encryption parameter (label Volume Encryption) and set it to True. When you add disks manually after provisioning, the encryption parameter is unneeded because the add-disk form has a checkbox.
VMware linked clones
A linked clone is a copy of a virtual machine that shares virtual disks with the parent virtual machine on an ongoing basis. This conserves disk space, allows multiple virtual machines to share the same software installation, and significantly reduces provisioning time. Although VMware documents linked clones primarily as a VMware Workstation feature, they are also available through the vCenter client, which is how CMP exposes them to users.
To enable linked cloning in CMP, an administrator must first convert the template to a virtual machine, then take a snapshot. Be deliberate about when you take the snapshot, as all linked clones share the virtual disk as of that point in time.
Next, add the Provision as VMware Linked Clone parameter (link_clone) globally, to the group, or to the environment. Setting this parameter to True provisions servers as linked clones.
Customizing open ports
The Azure and GCE resource handlers support the Open TCP Ports (open_ports_tcp) and Open UDP Ports (open_ports_udp) parameters. These values are passed to the server during provisioning and replace any default ports the resource handler would otherwise open on new servers. For example, when provisioning a Windows server on Azure, the default behavior is to open port 3389 for RDP and ports 5985–5986 for WinRM. If you specify ports with these parameters, only those ports are opened; the defaults are not.
Note: remote access via CMP expects the default ports to be open.
Setting up user-data parameters
To use CMP to set user data on one of the supported resource technologies, add the appropriate user_data parameter to your blueprint or environment:
- AWS:
aws_user_data - Nutanix:
acropolis_user_data - OpenStack:
os_user_data - Alibaba:
alibaba_user_data - SCVMM:
scvmm_user_data - MAAS:
maas_user_data - Oracle Linux VM:
olvm_user_data - Outscale:
outscale_user_data - oVirt / RHV:
ovirt_user_data - vCloud Director:
vcloud_director_user_data
When you add one of these parameters to your blueprint or environment, you can set default options or make it required. Your user data can also include variables from your server for CMP to interpret and replace.
Here is an example of a cloud-init script that sets a static IP on a CMP-provisioned CentOS image:
#cloud-config
hostname: {{server.hostname}}
fqdn: {{server.hostname}}.{{server.sc_nic_0.dns_domain}}
write_files:
  - path: /etc/sysconfig/network-scripts/ifcfg-eth0
    permissions: "0644"
    owner: "root"
    content:
      DEVICE=eth0
      BOOTPROTO="none"
      NETMASK="{{server.sc_nic_0.netmask}}"
      IPADDR="{{server.sc_nic_0_ip}}"
      GATEWAY="{{server.sc_nic_0.gateway}}"
      ONBOOT="yes"
      DNS1="{{server.sc_nic_0.dns1 }}"
runcmd:
  - [ifdown, eth0]
  - [ifup, eth0]
Before passing that data to the resource technology, CMP replaces {{server.hostname}} with the hostname of the server it is currently operating on, along with all other elements inside the double curly braces.
Waiting for a server to be ready
After a VM powers on, CMP can wait before continuing with the rest of the provisioning job. Two built-in parameters control that wait. Both can be set as a Global Parameter Default, at the group or environment level, in a blueprint, as part of a preconfiguration, or on the order form.
The VM Customization Timeout parameter (vm_customization_timeout) sets how many seconds CMP waits for the resource handler to report a server as fully ready, for example, that it has an IP address and the expected hostname. If the server does not report ready within that time, the job fails with a timeout. Leave the parameter unset to use the resource handler’s default.
This parameter applies to resource handlers that check readiness, including AWS, Azure, Hyper-V, OpenShift Virtualization, Outscale, QEMU-KVM, SCVMM, and VMware. Increase it when templates are slow to complete first-boot customization; Windows templates, in particular, can take longer than the default allows.
The Post Provisioning Delay parameter (post_prov_delay) adds a fixed wait, in seconds, after the readiness check. Unlike the timeout, this delay always runs for its full duration. Use it when a server reports itself ready before the services running on it are usable.
When both are set, CMP first waits for readiness, then waits for the post-provisioning delay.
If a provisioning job is failing on a customization timeout, see Provisioning issues and parameters.