Import AMIs
3 minute read
CMP first syncs the AMIs available in AWS into its own list; then you pick from that list. Everything happens on the AMIs tab of an AWS resource handler.
Sync AMIs from AWS
Until AMIs have been synced, the import dialogs report that no AMIs are available.
- Go to Admin > Resource Handlers and open the AWS handler.
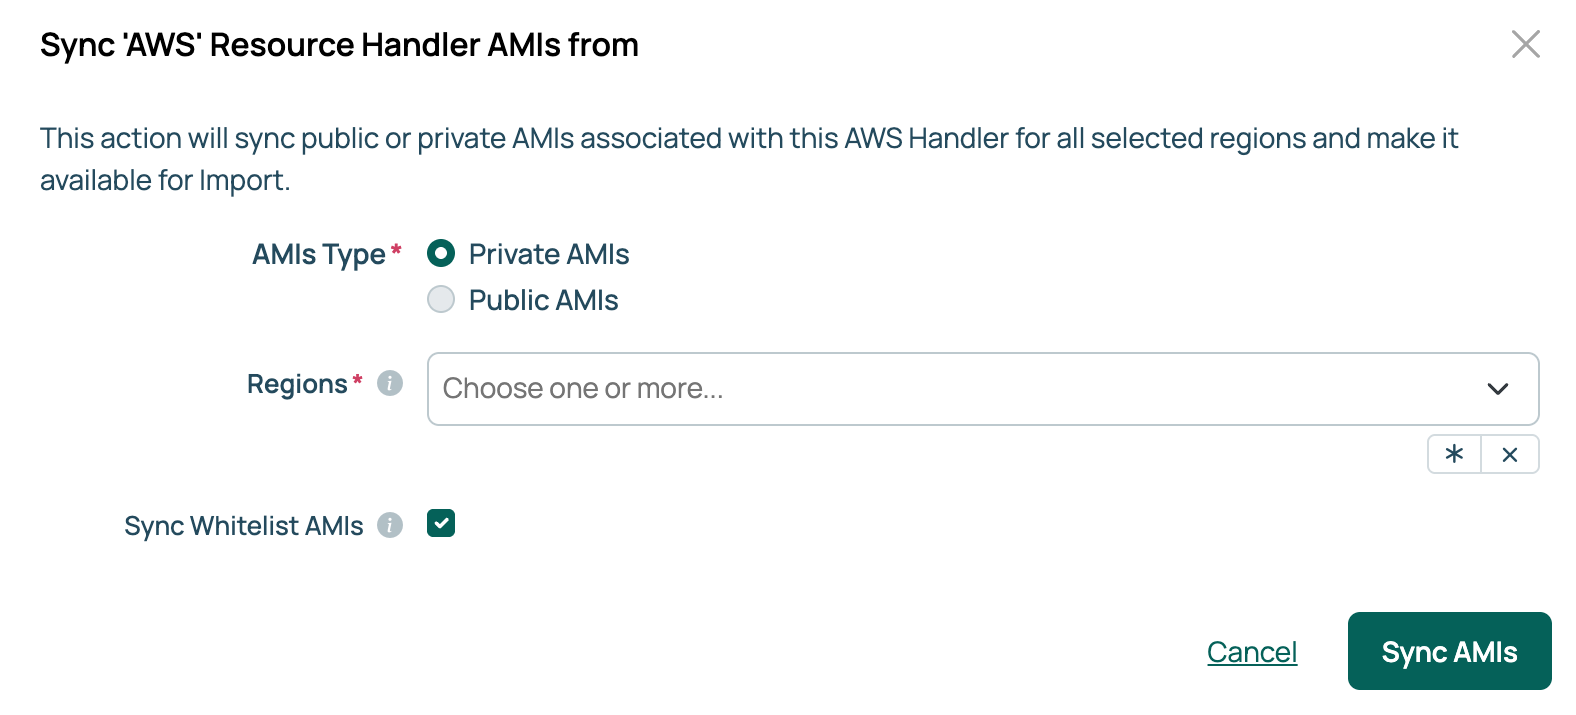
- Go to the AMIs tab and select Sync AMIs.
- Under AMIs Type, select Private AMIs or Public AMIs.
- Select the Regions to sync. Only regions already imported for this handler are listed.
- For public AMIs, leave Sync Whitelist AMIs selected unless you need the full list. AWS publishes a large number of public AMIs, and syncing them all takes 15 minutes or more per region.
- Select Sync AMIs. CMP starts a job; open it to follow progress.
 (opens full-size image in a new tab)
The allowlist
The allowlist limits a public sync to images whose names match a pattern. CMP ships with this list: RHEL*, CentOS*, Windows*, Ubuntu*, Oracle*, and Rocky*, plus one Amazon Linux 2023 image. To use your own instead, set AWS_AMI_WHITELIST_SYNC_AMIS to a list of patterns in customer_settings.py on the appliance.
Sync on a schedule
The Fetch and Cache available AWS AMIs recurring job does the same work for public AMIs on every AWS handler and their imported regions. To refresh private AMIs, run Sync AMIs with Private AMIs selected. It is disabled as shipped, and scheduled for 1:15 AM daily. Enable it under Admin > Recurring Jobs to keep the list up to date without syncing manually. Its use_whitelist action input controls the allowlist, and is True by default.
Import AMIs
The AMIs tab offers the following import options:
- Import AMIs, next to a region’s heading, imports public AMIs into that region.
- Import AMIs for All Regions imports public AMIs into every imported region at once.
- Import Private AMIs imports the account’s own AMIs.
- Select your import option.
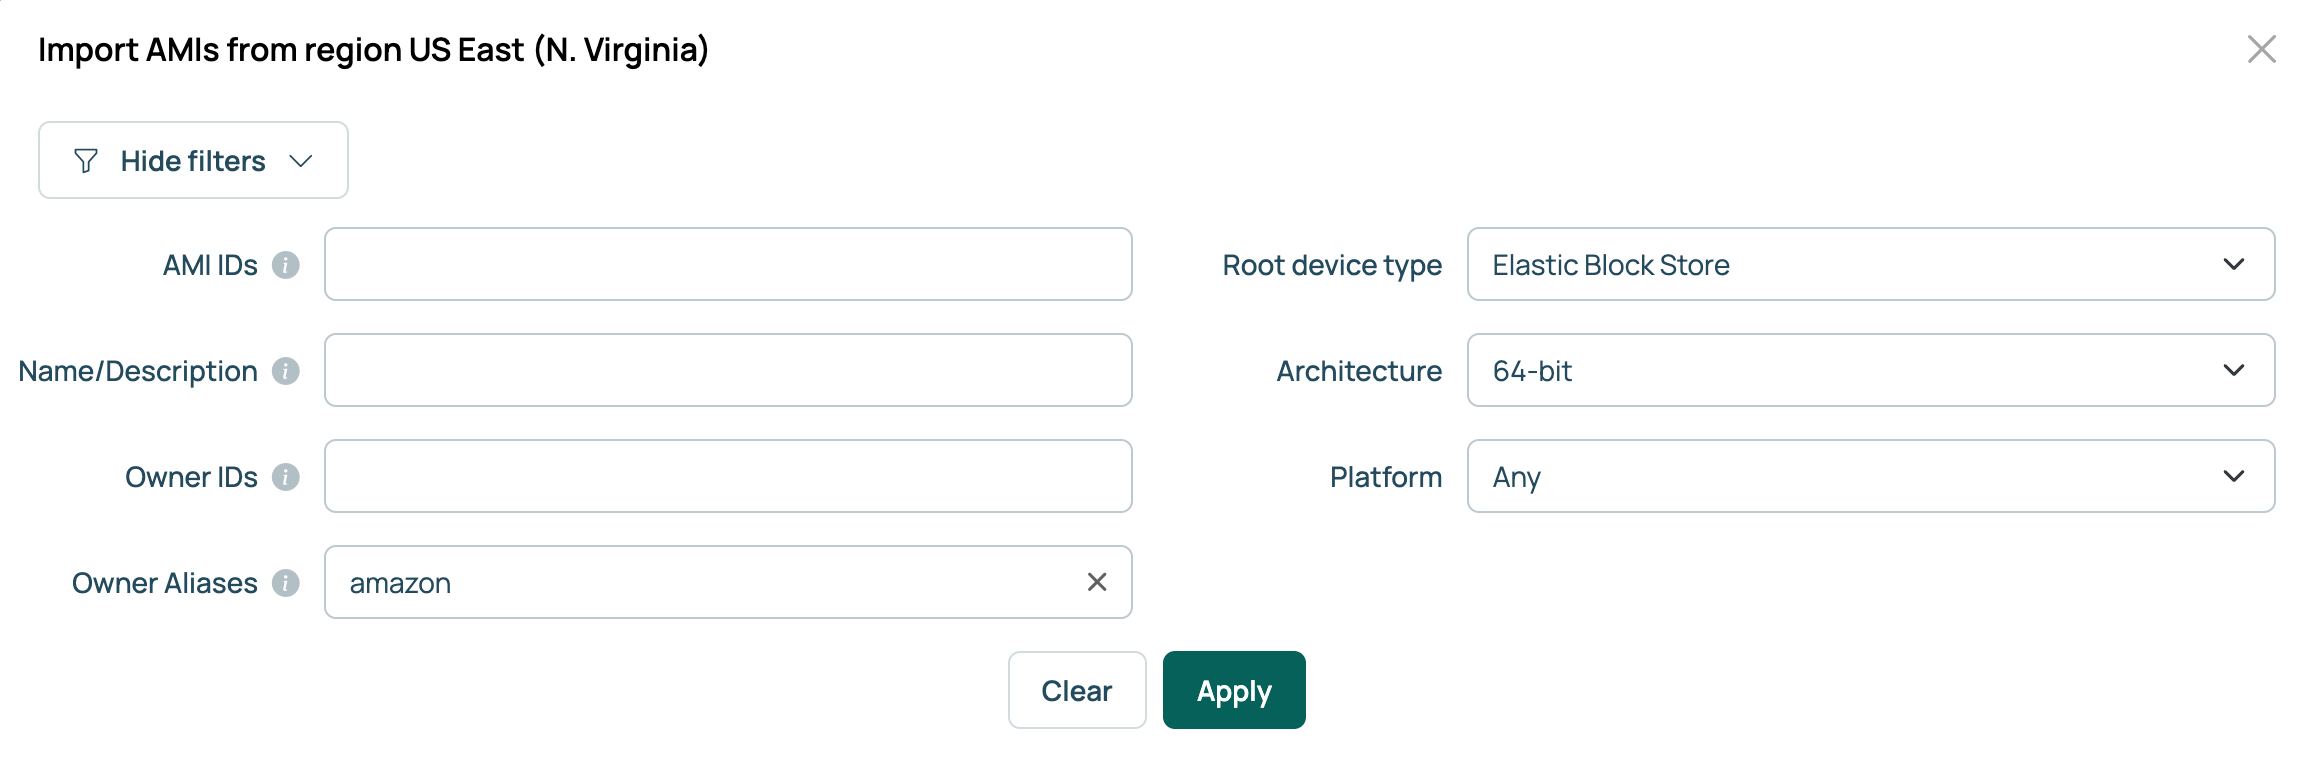
- Narrow the list with the search fields. You can search by AMI IDs, Name/Description (which accepts substrings and * wildcards), Owner IDs, and Owner Aliases, which starts at amazon. The root device type, architecture, and platform filters start at ebs, x86_64, and Any.
- Select the AMIs you want and select Next.
- Map each AMI to an OS build. Take the offered new OS build, named after the AMI, or select an existing one. Each OS build can take only one AMI per region, so an OS build you have already chosen is unavailable for the rest of the selection.
- Complete the dialog. CMP creates or updates the OS builds and adds each AMI to the environments in its region.
 (opens full-size image in a new tab)
If you import the same AMI into another region, CMP reuses the existing OS build as long as the build name matches the AMI name.
When no AMIs are offered
- “No available AWS AMIs were found” means nothing has been synced for those regions yet. Run Sync AMIs for those regions. This also happens after importing a new region.
- A Cache Error dialog means CMP could not read its cache. Check that the cache service is working under Admin > System > System Status, in Health Checks.