Okta identity provider
3 minute read
Before you begin
- Complete Set up SSO and SAML and Configure the identity provider.
- Capture the IdP XML metadata.
- Create at least one branded portal for this SSO provider.
- Have an Okta administrator account that can create an application and add users.
- Have an Okta organization.
Add the Okta SSO provider in CMP
- Log in to CMP as an administrator.
- Select Admin > Single Sign-On (SSO).
- Select Add > Okta.
- Complete the SAML settings form.
You need the Single Sign-On URL and Metadata URL / Entity ID for the Okta application.
Create the Okta application
In Okta, make sure you are in the Admin menu (https://<instance-name>.okta.com/admin).
You must be in the Classic UI view in Okta for the following to work. Check your view from the dropdown above the Okta logo.
-
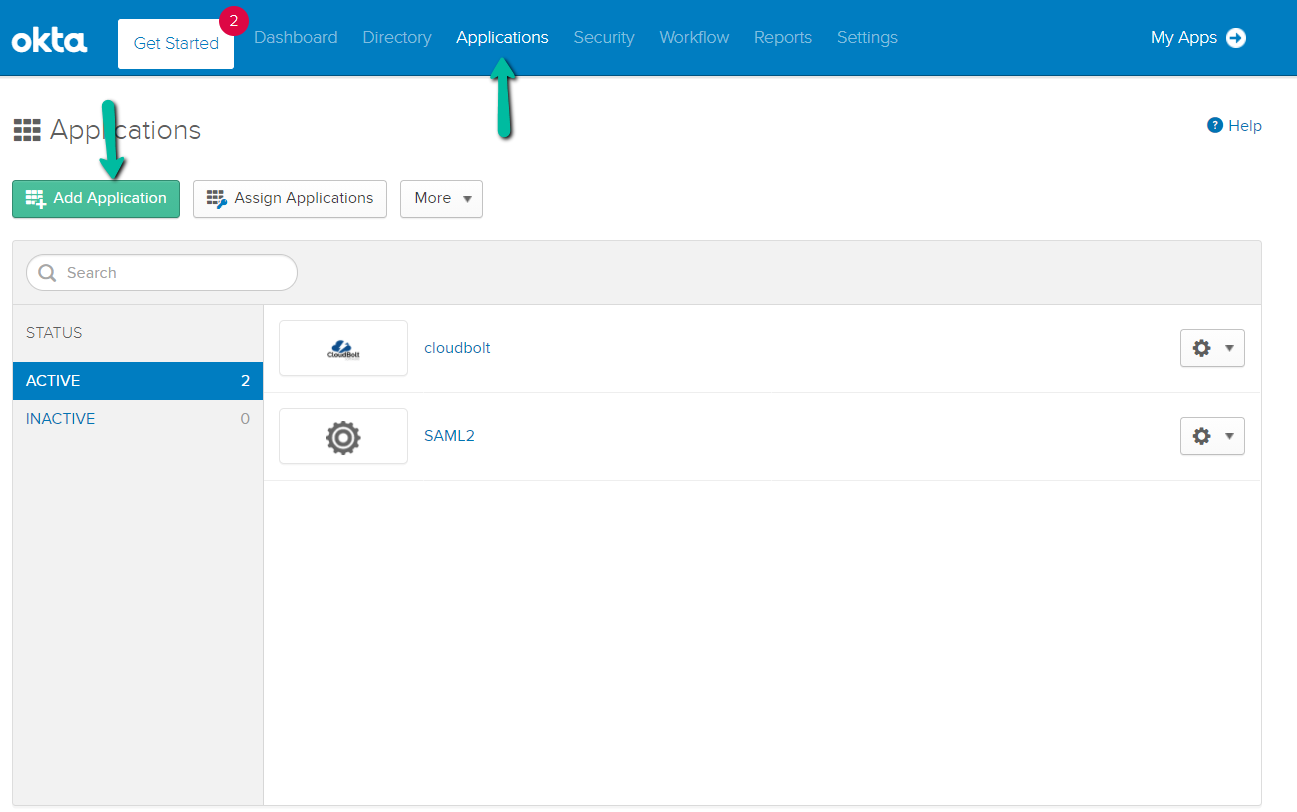
Select the Applications tab.
-
Select Add Application > Create New App. Leave Web selected and choose SAML 2.0.
-
In General Settings, enter the App name.
-
Select Next to continue to Configure SAML.
Configure SAML
Enter the following values, then select Next:
In General Settings:
| Field | Description |
|---|---|
| App name | Enter a name for this app. |
In Configure SAML:
| Field | Description |
|---|---|
| Single sign-on URL | In CMP, open your Okta SSO provider. On the Overview tab, copy the Single Sign-On URL and paste it here. |
| Use this for Recipient URL and Destination URL | Enabled |
| Allow this app to request other SSO URLs | Disabled |
| Audience URI (SP Entity ID) | In CMP, open your Okta SSO provider. On the Overview tab, copy the Metadata URL / Entity ID and paste it here. |
| Default RelayState | Identifies a specific application resource in an IdP-initiated SSO scenario. Usually blank. |
| Name ID format | Unspecified |
| Application username | Okta username |
| Update application username on | Create and Update |
In Attribute Statements:
| Name | Value |
|---|---|
| user.email | |
| username | user.login |
| firstName | user.firstName |
| lastName | user.lastName |
Configure feedback
- Select I’m an Okta customer adding an internal app.
- For App Type, select This is an internal app that we have created.
- Select Finish.
Download the IdP metadata
-
In the new Okta application, select the Sign On tab.
-
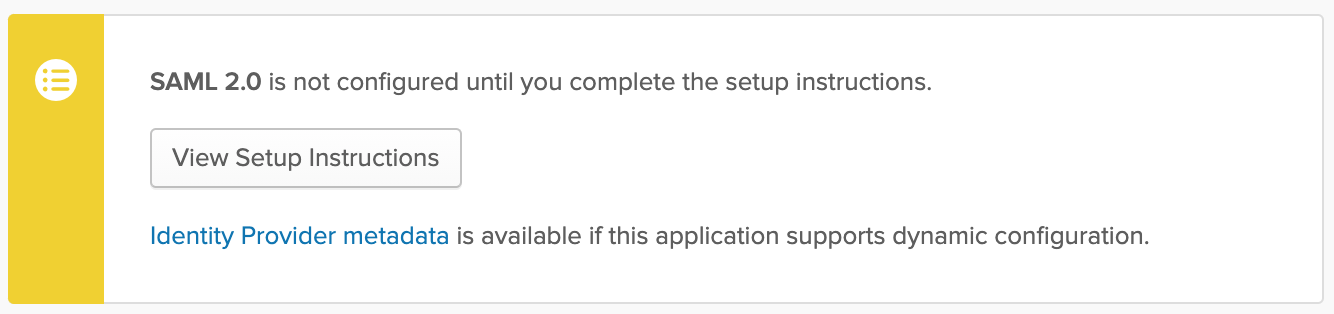
In the Settings area, find the SAML 2.0 box.
-
Right-click the Identity Provider metadata link and select Save Link As to save it to your machine.
Assign user access
- In the new Okta application, select the Assignments tab.
- Select Assign > Assign to People.
- Search for people or select from the list, then select Assign.
- Select Done.
Finish SSO setup in CMP
- Log in to CMP as a Super Admin.
- Go to Admin > Single Sign-On (SSO).
- Select Okta.
- Import the XML metadata file you saved in Download the IdP metadata.
- Select Edit.
- If you did not choose one at setup, scroll to the Branded Portal dropdown and select a portal for Okta.
- (Optional) Enable auto-login:
- Go to Admin > Miscellaneous Settings.
- Set Automatically Login to SSO to On.
- Log out of CMP, then sign back in. You are redirected to Okta to log in.
If configured successfully, CMP creates a new user account.