Office 365 identity provider
2 minute read
Office 365 uses the same setup as Microsoft Entra (formerly Azure AD). The screenshots here are from the Microsoft Entra SSO interface.
Before you begin
- Complete Set up SSO and SAML and Configure the identity provider.
- Capture the IdP XML metadata.
- Create at least one branded portal for this SSO provider.
Configure Office 365
In Office 365, configure an enterprise application linked to SSO for CMP.
-
In Office 365, manage the enterprise application.
-
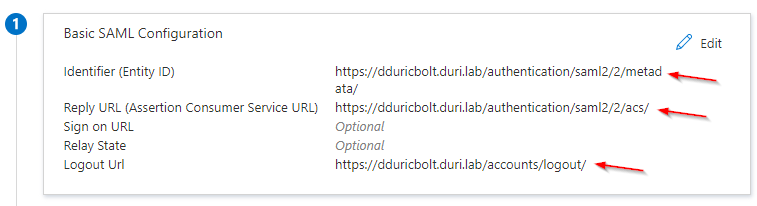
In the Manage menu, select Single sign-on. Set Identifier (Entity ID), Reply URL (Assertion Consumer Service URL), and Logout URL to point to your CMP instance.
Copy the claim names
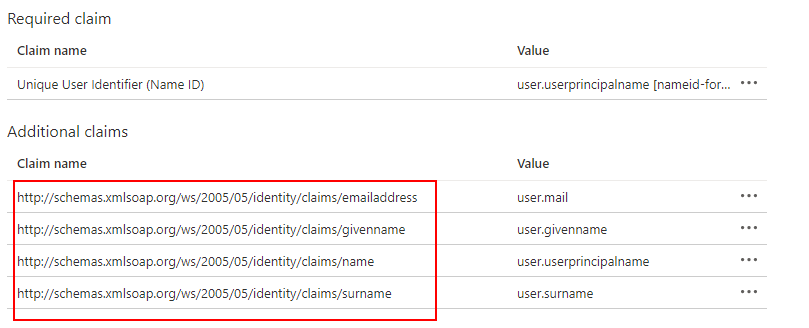
User attributes and claims are standard in Office 365. You can change the defaults or add more if required.
-
In User Attributes & Claims, select Edit.
-
In the Additional claims > Claim name column, copy the claim names. You will use them during CMP configuration.
Set up signing and notifications
-
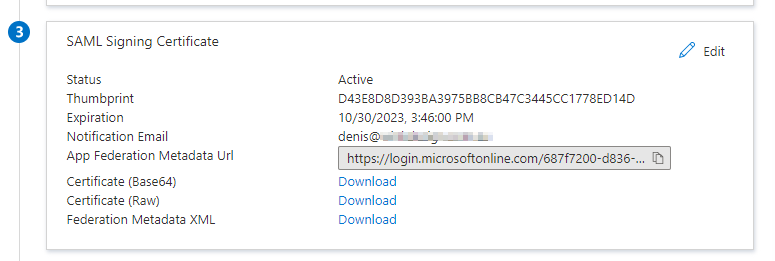
In this example, Sign SAML Assertion and SHA-256 are set, along with an email address for notifications.
-
Gather the federation metadata for CMP configuration: either copy the App Federation Metadata URL or download the Federation Metadata XML file.
-
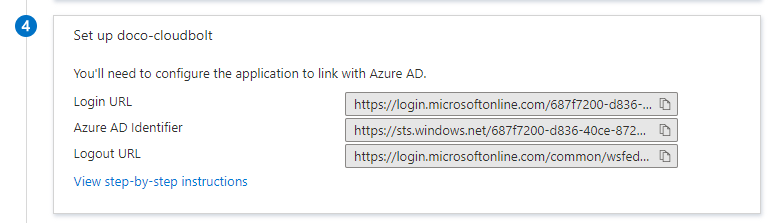
In Office 365, configure Step 4 as shown.
Step 5 in Office 365 (Test single sign-on) does not work until SSO is configured in CMP.
Make sure you have added the users and groups that need access to this enterprise application.
Set up Office 365 SSO in CMP
- Follow the steps in Set up SSO and SAML.
- On the SSO provider’s SAML settings, complete the fields with information from your Office 365 tenant. Set Name ID Format to Email Address and clear Response Signed.
- In the Attribute Name fields, paste the claim names from Copy the claim names, step 2.
- Select Create.
Upload the Office 365 metadata
- On the Overview tab, select Upload IdP XML.
- Choose a source for the metadata. In this example, Metadata URL is used.
- Paste the App Federation Metadata URL you copied in Set up signing and notifications, step 2.
- Select Save.
Log in with SSO
Log out of CMP and log back in. You should see a Log In with <SSO provider name> button.
- If you are logged in with a valid user, you are automatically redirected and logged in.
- If you are logged out of Office 365, it sends a two-factor authentication request if two-factor authentication is configured.