OpenShift Virtualization
6 minute read
Each imported OpenShift namespace becomes a CMP environment. CMP builds servers from OpenShift Virtualization templates and persistent volume claims (PVCs).
Before you begin
- OpenShift Virtualization is disabled by default. If its tile is missing from the technology picker, enable the resource handler.
- The cluster’s base domain and network access from CMP to its API, which listens on port
6443by default. - A service account token that can list namespaces, or the username and password of an OpenShift account.
Add an OpenShift Virtualization resource handler
-
Go to Admin > Resource Handlers, select Add, then select OpenShift Virtualization under Private Cloud.
-
Complete the credentials fields described below, then select Continue. CMP checks the connection at this point.
-
Enter a Name, complete any of the optional settings described below, then select Done.
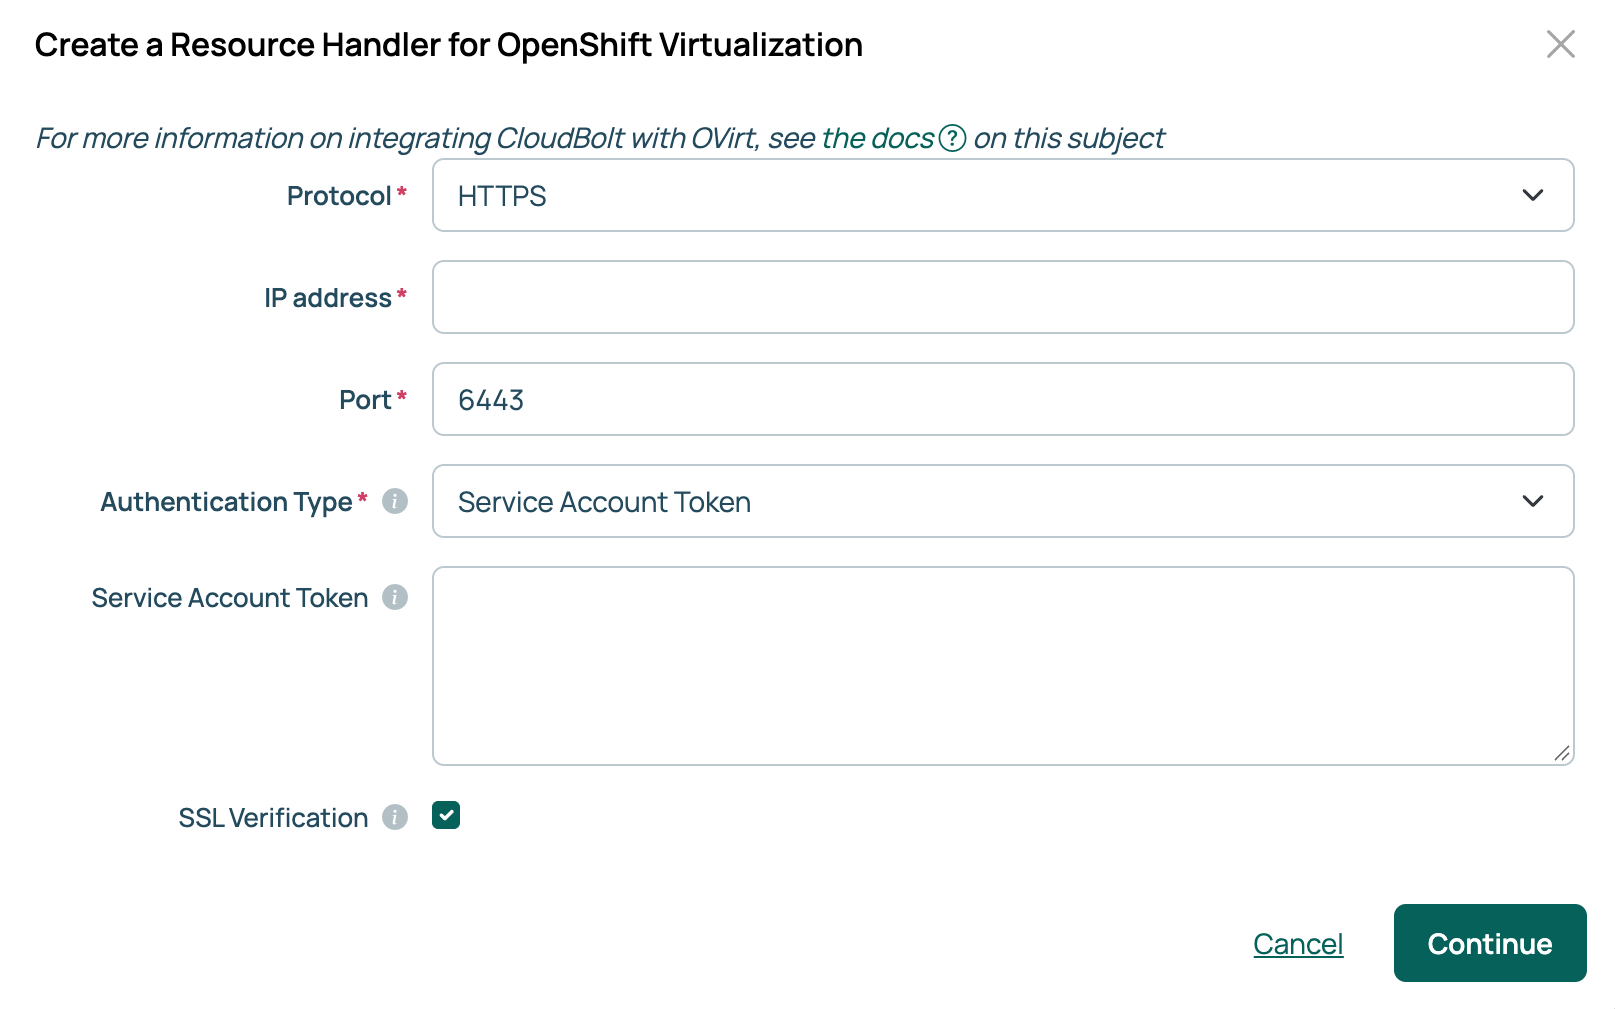
| Field | Description |
|---|---|
| Protocol | HTTPS (the default) or HTTP. |
| IP address | The cluster’s base domain, for example, cluster.example.com for a cluster whose API is at api.cluster.example.com. CMP adds the api. prefix and the port, so leave out the protocol, api., and the port. Enter a domain rather than an IP address. |
| Port | The OpenShift API port. Defaults to 6443. |
| Authentication Type | Service Account Token (the default) or Account Credentials. The fields below change to match. |
| Service Account Token | Shown for Service Account Token. Paste the token. When you edit the handler’s credentials later, paste it again: the field is not filled in from the saved handler. |
| Account username and Password | Shown for Account Credentials. If the password vault feature is enabled, Password offers Locally Stored or Vault Managed. Select Vault Managed to read the secret from a configured vault provider. See Use password vaults. |
The settings dialog also includes:
- VM Names to Ignore: comma-separated regular expressions. Matching VMs are left out of syncs.
- VM Tags to Include: comma-separated regular expressions. When set, CMP syncs only VMs with a matching tag; when empty, it syncs all of them.
- Filesystem Overhead Data (JSON): the filesystem overhead values from the cluster’s CDIConfig, which CMP subtracts when it reports a disk’s usable size. Rather than typing them, select Sync Filesystem Overhead on the handler’s Overview tab to fetch them from the cluster.
Import namespaces
A new handler has no environments until you import a namespace. CMP creates one environment for each selected namespace.
- On the handler, open the Namespaces tab and select Import Namespaces.
- Select namespaces, then select Import selected namespaces.
To add another environment for an imported namespace, select the plus icon beside it and select Create. To give an environment networks, open it, then on its Networks tab select Import Subnets.
Import templates and PVCs
An environment builds servers from the templates and PVCs you import and link to it.
- On the handler, open the Templates tab and select Import Templates. The list shows templates that reference a bootable data source, including custom templates created in your cluster alongside the built-in ones.
- Select templates, then select Import selected Templates.
- To import PVCs, select Import Persistent Volume Claims. Choose a Namespace and select Apply to list its PVCs; the dialog opens with
openshift-virtualization-os-imageswhen that namespace exists. - Select PVCs, then select Import selected PVCs.
- In the OS Build Environments column, select the edit icon for a template or PVC and choose the environments that may use it.
A custom template can declare parameters that CMP cannot supply. When one does, CMP names the parameters that need a default value, so you can set them on the template in your cluster before ordering it.
Sync VMs
CMP syncs virtual machines only from namespaces you have imported.
- On the handler, open the Servers tab.
- Select Sync VMs from followed by the handler’s name. The Dry-run Sync VMs from button beside it previews the sync without making any changes.
Manage servers
From a server’s page in CMP, you can:
- Power it off and on, and reboot it.
- Change its CPUs and memory with Change Resources.
- Add, extend, and delete disks, and add network interfaces.
- Take a snapshot with Create Snapshot. CMP keeps one snapshot per server and replaces it each time.
- Run scripts with Ad Hoc Script.
The resource handler page
A handler’s page has the following tabs:
| Tab | What it offers |
|---|---|
| Overview | Edit Credentials, Edit Settings, Delete, Verify Connection, and Sync Filesystem Overhead. The RDP/SSH Terminal switch turns browser-based remote access to this handler’s servers on or off; it is disabled by default. See Remote server access. |
| Namespaces | The imported namespaces and their environments. |
| Templates | Imported templates and PVCs, with their OS builds, environments, and credentials. |
| Servers | The handler’s servers and the sync buttons. |
| Compute Limits | Make Changes sets limits on CPUs, memory, disk, and servers. |
| History | Changes made to the handler. |
| Tags | Add creates a tag from a server attribute. Each tag can be edited, deleted, or set to sync. |
OpenShift Virtualization parameters
CMP creates these parameters when the first OpenShift Virtualization handler is saved. Customize Virtual Machine, OVirt Storage Class, CPU Implementation, and Boot Mode options are imported for each environment.
| Parameter | Description |
|---|---|
| Customize Virtual Machine | Required. Select Yes to show Mem Size, OVirt Storage Class, and CPU Implementation, which set the server’s memory, storage class, and CPUs. |
| Mem Size | Required. The server’s memory. |
| CPU Implementation | Required. How CPUs are specified: vCPUs shows CPUs, and Topology shows Sockets, Cores, and Threads. |
| CPUs | The number of virtual CPUs, when CPU Implementation is vCPUs. |
| Sockets, Cores, Threads | The CPU topology, when CPU Implementation is Topology. Each is at least 1. |
| Boot Mode | BIOS, UEFI, or UEFI (secure). |
| Power On Run Strategy | Always or RerunOnFailure. |
| OVirt Network Model | The network interface model: virtio or e1000e. |
| OVirt Storage Class | The storage class of the first disk. OVirt Disk 2 Storage Class through OVirt Disk 4 Storage Class set it for further disks. |
| OVirt Disk Interface Name | The first disk’s interface: virtio, scsi, or sata. OVirt Disk 2 Interface Name through OVirt Disk 4 Interface Name set it for further disks. |
| Ovirt Disk Access Mode | The first disk’s access mode: ReadWriteOnce, ReadWriteMany, or ReadOnlyMany. Ovirt Disk 2 Access Mode through Ovirt Disk 4 Access Mode set it for further disks. |
| OVirt Sysprep File | A Sysprep answer file for Windows templates. See Using Windows Sysprep with resource handlers. |
| Ovirt User Data | User data passed to new servers, treated as a template so values such as {{ server.hostname }} are filled in at build time. |
CMP sets the namespace on each environment when you import it.
Related
- Resource handlers: the technologies CMP connects to, and how to enable a disabled one.
- Waiting for a server to be ready: set how long CMP waits for a new VM to report its IP address and hostname.
- Remote server access: RDP and SSH to servers from the CMP interface.
- Use password vaults: store passwords in HashiCorp Vault, CyberArk, Keeper, AWS Secrets Manager, or Azure Key Vault.