Authenticate with an IAM role
2 minute read
Access keys have to be rotated and tracked, which gets tedious across many accounts. With the IAM role option, the keys live in one place: an AWS account profile stored under Connection Info. Each handler then names the role Cloud Management Platform (CMP) should assume.
Create the AWS account profile
The profile holds the access key and secret key CMP uses to assume the role. Create it before the handler, because the add dialog offers only profiles that already exist.
- Go to Admin > Connection Info.
- Select AWS Account Profile.
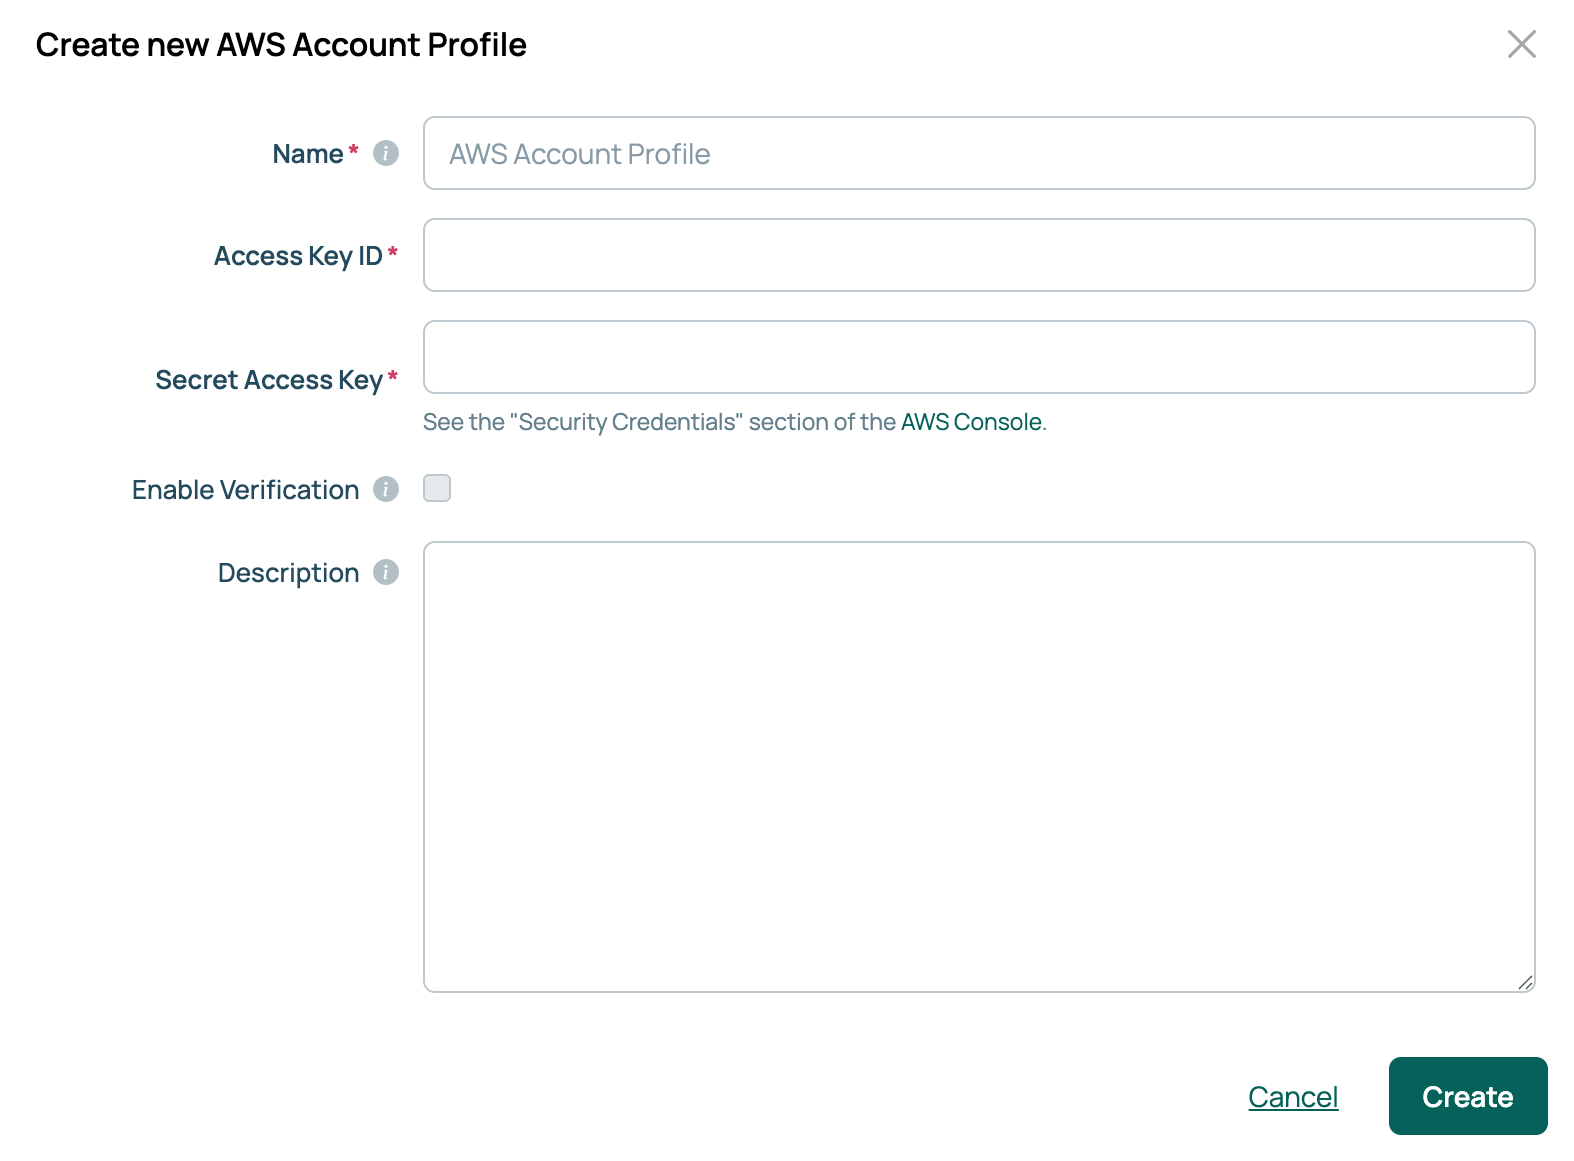
- Enter a Name, the Access Key ID, and the Secret Access Key.
- Select Enable Verification to have CMP check the keys against AWS before saving. This calls
ec2:DescribeAccountAttributes, so the key must carry that permission or the check fails. Leave it clear to save without checking. - Select Create.
 (opens full-size image in a new tab)
One access key ID can be used by one AWS account profile. Adding a second profile with the same key is rejected.
Create the handler
- Go to Admin > Resource Handlers and select Add.
- Select the Amazon Web Services tile.
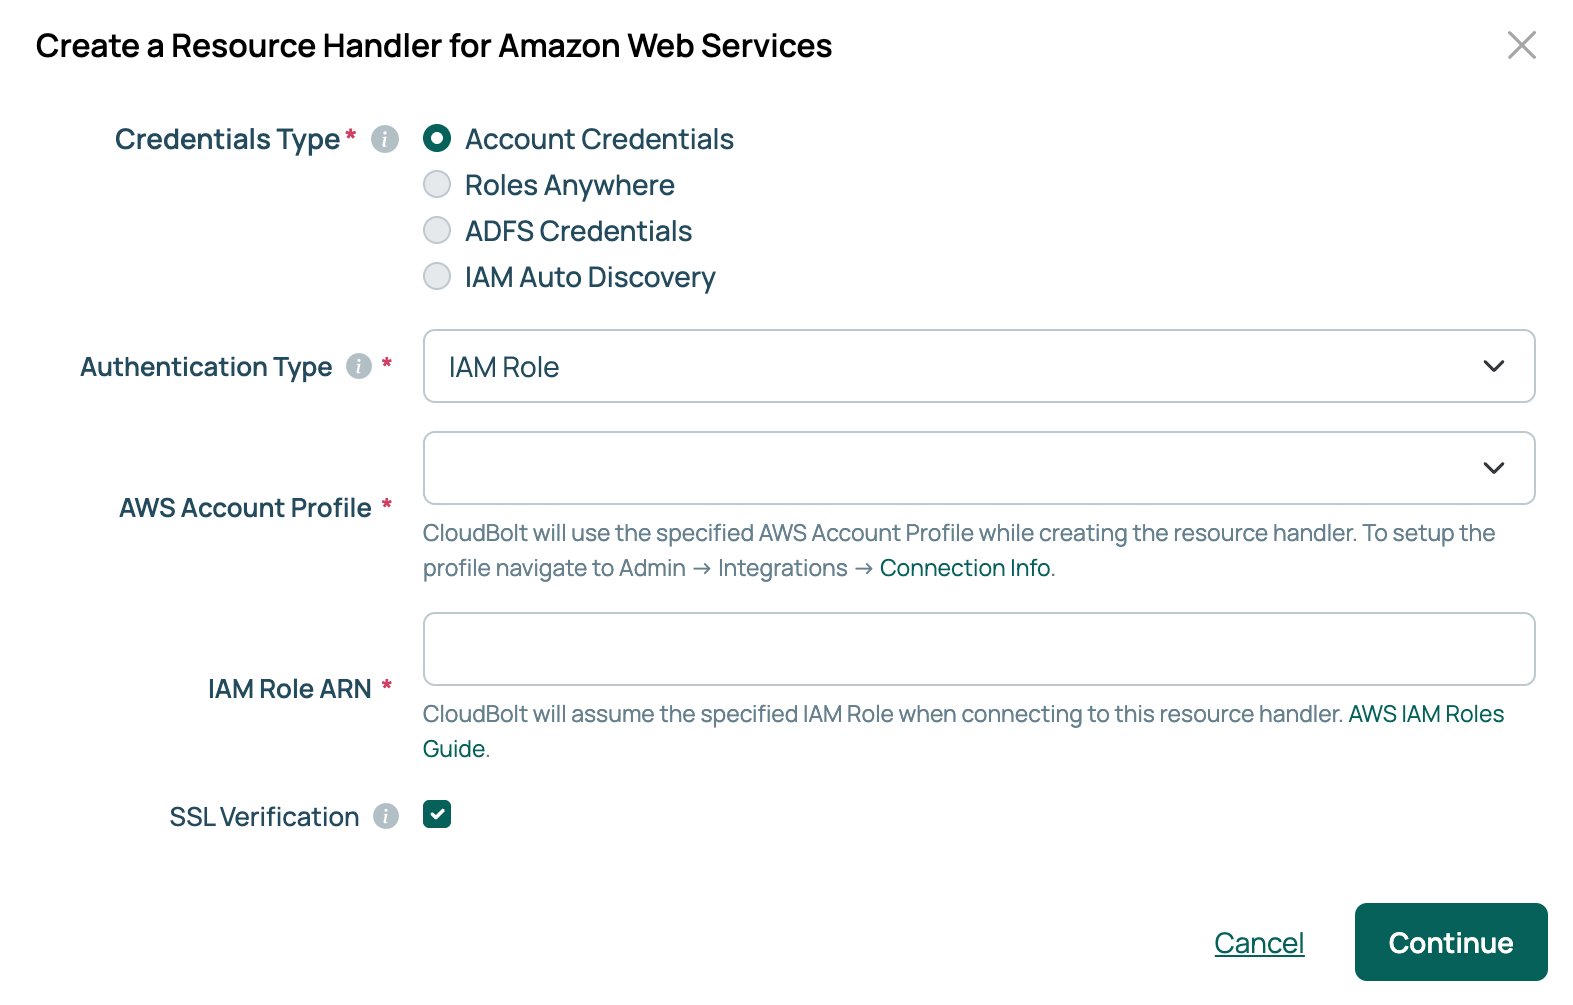
- Leave Credentials Type set to Account Credentials and set Authentication Type to IAM Role.
- Select the AWS Account Profile you created.
- Enter the IAM Role ARN for the role CMP should assume, in the form arn:aws:iam::account-id:role/role-name. The role is defined in the target AWS account. See IAM roles in the AWS documentation.
- Select Continue, then complete the handler’s settings and select at least one region, as described under Add an AWS resource handler.
 (opens full-size image in a new tab)
The role ARN appears on the handler’s Overview tab. Use Verify Connection to confirm CMP can assume it.
Create the IAM role with CloudFormation
A CloudFormation template creates the role with a trust policy that allows the account holding your access key to assume it.
- Download cloudbolt_assume_iam_role_template.json from CloudBolt Forge.
- In the AWS console, go to CloudFormation and create a stack.
- Under Prerequisite, select Template is ready. Under Specify template, select Upload a template file and upload the template.
- Enter a stack name, then enter the AWS account ID that will assume the role. Enter a role name to override the default.
- Review the stack, acknowledge that it creates IAM resources, and submit it.
The role needs the permissions listed under AWS permissions.
Related
- AWS: the other credentials types, and what an AWS handler needs permission to do.
- Import AMIs: bring AMIs into CMP as OS builds.
- Connection Info: where the AWS account profile is stored.