Proxmox Virtual Environment
3 minute read
Each imported Proxmox node becomes a CMP environment. CMP builds a server by cloning a Proxmox VM template, then sets its CPUs, memory, and disk size.
Before you begin
- Proxmox Virtual Environment is disabled by default. If its tile is missing from the technology picker, enable the resource handler.
- A Proxmox account that logs in with a username and password, in the Linux PAM or Proxmox VE realm. The account must not require two-factor authentication.
- Network access from CMP to the Proxmox API, which listens on HTTPS port
8006by default.
Add a Proxmox resource handler
-
Go to Admin > Resource Handlers, select Add, then select Proxmox Virtual Environment.
-
Complete the credentials fields described below, then select Continue. CMP checks the connection before moving on.
-
Enter a Name, and optionally a Description and VM Names to Ignore, then select Done.
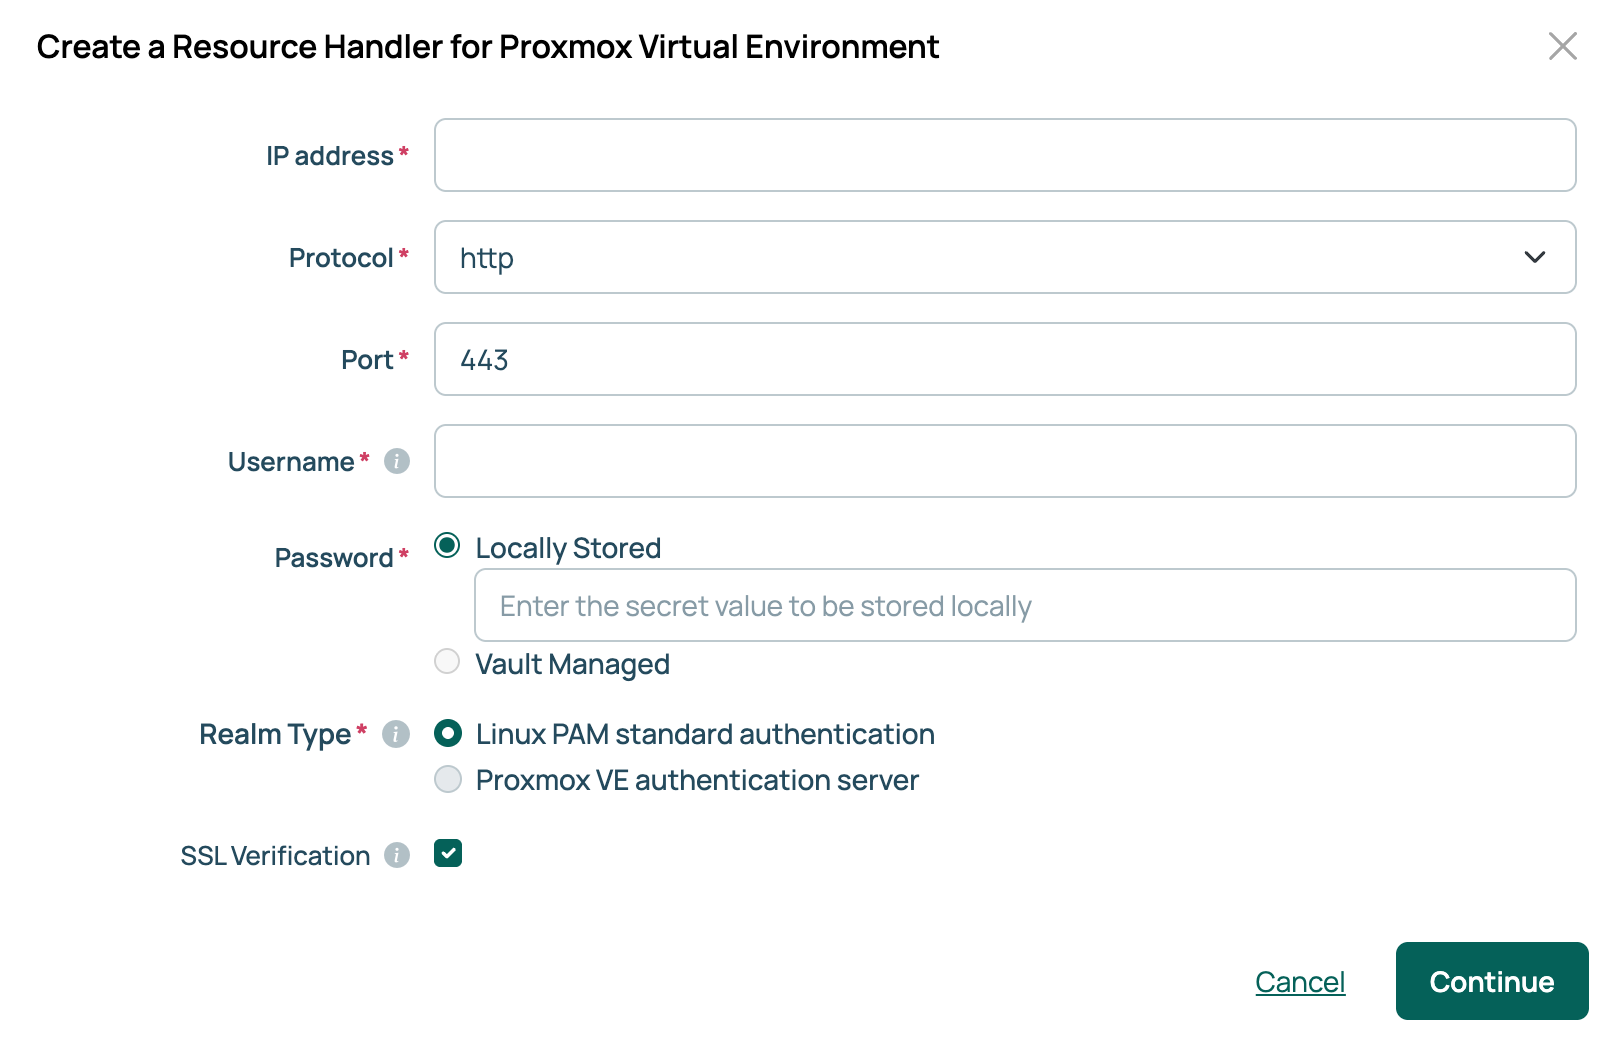
| Field | Description |
|---|---|
| IP address | The host name or IP address of the Proxmox server. |
| Protocol | https, which is what the Proxmox API uses. The dialog opens with http; change it. |
| Port | The Proxmox API port, usually 8006. The dialog opens with 443; change it unless your server listens there. |
| Username | The Proxmox username, without the realm, for example root. Choose the realm under Realm Type. |
| Password | The password for that account. If the password vault feature is enabled, this field offers Locally Stored or Vault Managed. Select Vault Managed to read the secret from a configured vault provider. See Use password vaults. |
| Realm Type | Where the account is defined: Linux PAM standard authentication (the default) or Proxmox VE authentication server. |
| SSL Verification | Whether CMP verifies the Proxmox server’s SSL certificate. |
Import nodes
A new handler has no environments until you import a node. CMP creates one environment for each selected node.
- On the handler, open the Nodes tab and select Import nodes.
- Select nodes, then select Import selected nodes.
To add another environment for an imported node, select the plus icon beside it and select Create. To remove a node from CMP, delete its associated environments.
Import templates
An environment cannot provision until a template is imported and linked to it. CMP imports Proxmox VM templates.
- On the handler, open the Templates tab and select Import templates.
- Select templates, then select Import selected templates.
- In the OS Build Environments column, select the edit icon for a template, choose the environments that may use it, then select Save changes.
The Nodes and Templates tabs display a warning icon until at least one node is imported and at least one template is linked to an environment.
Sync and manage servers
To bring existing Proxmox virtual machines into CMP, open the handler’s Servers tab and select Sync VMs from followed by the handler’s name. The Dry-run Sync VMs from button beside it previews the sync without making any changes.
From CMP, you can power Proxmox servers on and off, reboot them, and delete them.
Proxmox parameters
CMP creates these parameters when the first Proxmox handler is saved. Storage and Resource Pool options are imported from the node when you create an environment.
| Parameter | Description |
|---|---|
| Storage | Required. The Proxmox storage the server’s disk is placed on. |
| Disk Size (GiB) | Required. The size of the server’s disk, from 16 to 500 GiB. Use a size at least as large as the template’s disk. |
| Resource Pool | The Proxmox resource pool the server is added to. |
| Disk Format | Optional. The virtual disk format: raw, qcow2, or vmdk. Appears only when Storage is local. |
CMP sets Proxmox Node in each environment when you import the node.
Related
- Resource handlers: the technologies CMP connects to, and how to enable a disabled one.
- Environments: what CMP creates for each node you import.
- Use password vaults: store passwords in HashiCorp Vault, CyberArk, Keeper, AWS Secrets Manager, or Azure Key Vault.