Workspace admin tasks
Manage workspace users as a Workspace Admin
2 minute read
Users with the Workspace Admin role can access the Workspace Admin menu from the left navigation menu.
Once a Super Admin has created local users, the Workspace Admin must add them to the Workspace before they can access it.
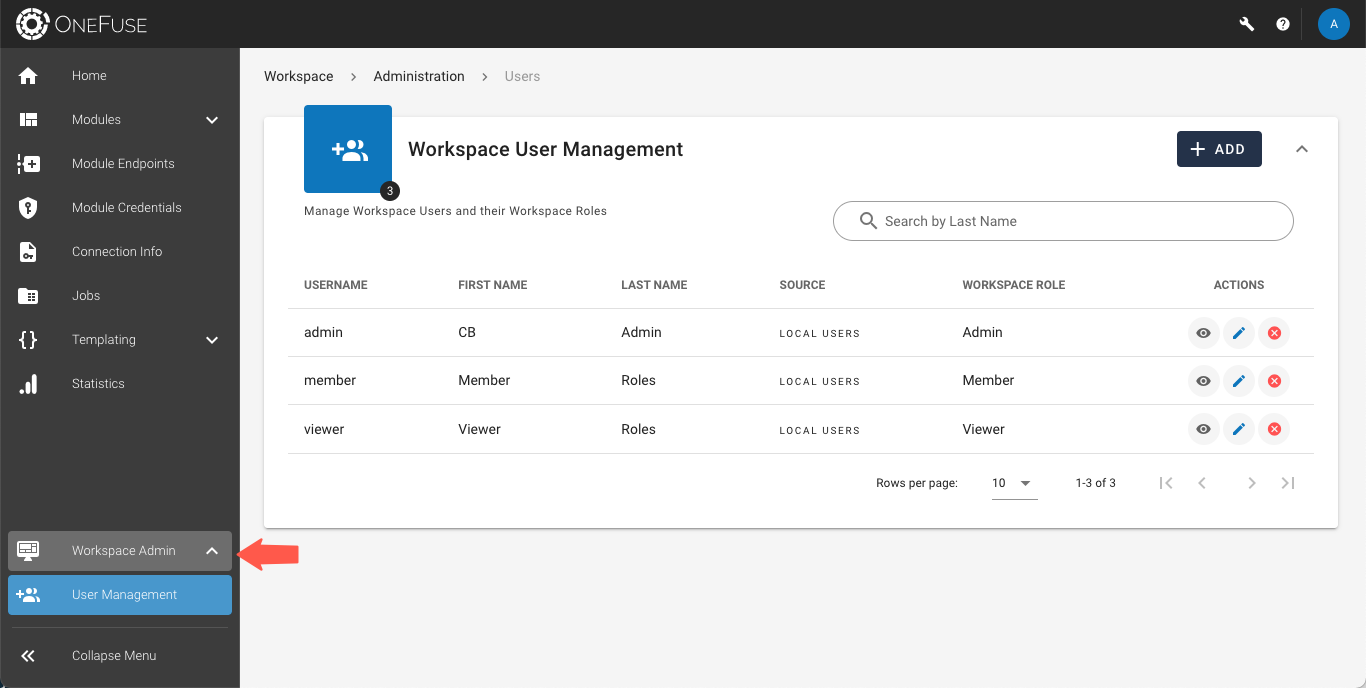 (opens full-size image in a new tab)
Manage workspace users
Access the Workspace User Management dashboard
- Log in to the OneFuse UI.
- If you are in the Super Admin UI and have the Workspace Admin role, select Return to Workspace on the Top App Bar.
- Select Workspace Admin > User Management from the left navigation menu.
Add a workspace user
Add a new user to access the OneFuse Workspace.
- Access the Workspace User Management dashboard.
- Select + Add.
- Fill out the user form:
- Select the user to add. If the user is not listed, ask a Super Admin to create the user.
- Select the Workspace Role for the user. See Roles, permissions, and access for details.
- Select Add.
- Inform the user that they have been added to the Workspace.
Remove a workspace user
Remove a user from the Workspace when they no longer need access.
- Access the Workspace User Management dashboard.
- Find the user of interest.
- Select the remove (×) button.
- Confirm by selecting Remove.
The user is removed from the Workspace but can be re-added until they are deleted from OneFuse entirely.
Update a workspace user’s role
- Reset a user’s password.
- A user can perform Update profile settings and Change my password.
- Access the Workspace User Management dashboard.
- Find the user of interest.
- Select the edit (pencil) button.
- Update the Workspace Role. To learn more, refer to Roles, permissions, and access.
- Select Update.