Install OneFuse from OVA
3 minute read
Download the latest OneFuse OVA
OneFuse is distributed as a CloudBolt OVA file, which is an open standard for packaging VM images for easy installation.
Access CloudBolt’s Download Article for CMP/OneFuse 2023.5.
The article will always contain the latest Appliance link.
- Log in with your CloudBolt Connect account.
- Download CloudBolt OVA.
Requirements
- Obtain and download the OneFuse license key.
- Purchase Key: Reach out to your CloudBolt Account Manager or our Customer Success team
- Optionally, obtain SSL Certificate(s) for OneFuse.
- Ensure your environment meets the following base requirements:
- A Virtualization Manager
- VMware vSphere 6.0+
- Citrix XenServer 6+
- Virtual Capacity for the Virtual Machine (VM)
- 2 CPUs minimum
- 8GB memory minimum
- 50GB storage minimum
- The initial VM will use 3GB if Thin Provisioned or 50GB if Thick Provisioned (recommended).
- A Virtualization Manager
Deploy the OneFuse VM from OVA
- Log in to your virtualization manager (for example VMware vSphere, Citrix XenServer).
- Deploy the OVA as a Virtual Machine (VM).
- Resources: the VMware vSphere documentation on deploying an OVA, or Import VMs from OVA via Citrix XenCenter
- Power on the newly created OneFuse VM.
Configure the OneFuse VM
OneFuse needs a few configuration items before you can access the web portal to continue your setup.
-
Connect to the VM’s remote console using your Virtualization Manager (for example VMware vSphere, Citrix XenServer).
If you use DHCP in your environment, press
ESCto exit.To re-run this configuration tool, execute command:
~/configure/config.py -
Log in to the VM console.
- Username:
root - Password:
cloudbolt
- Username:
-
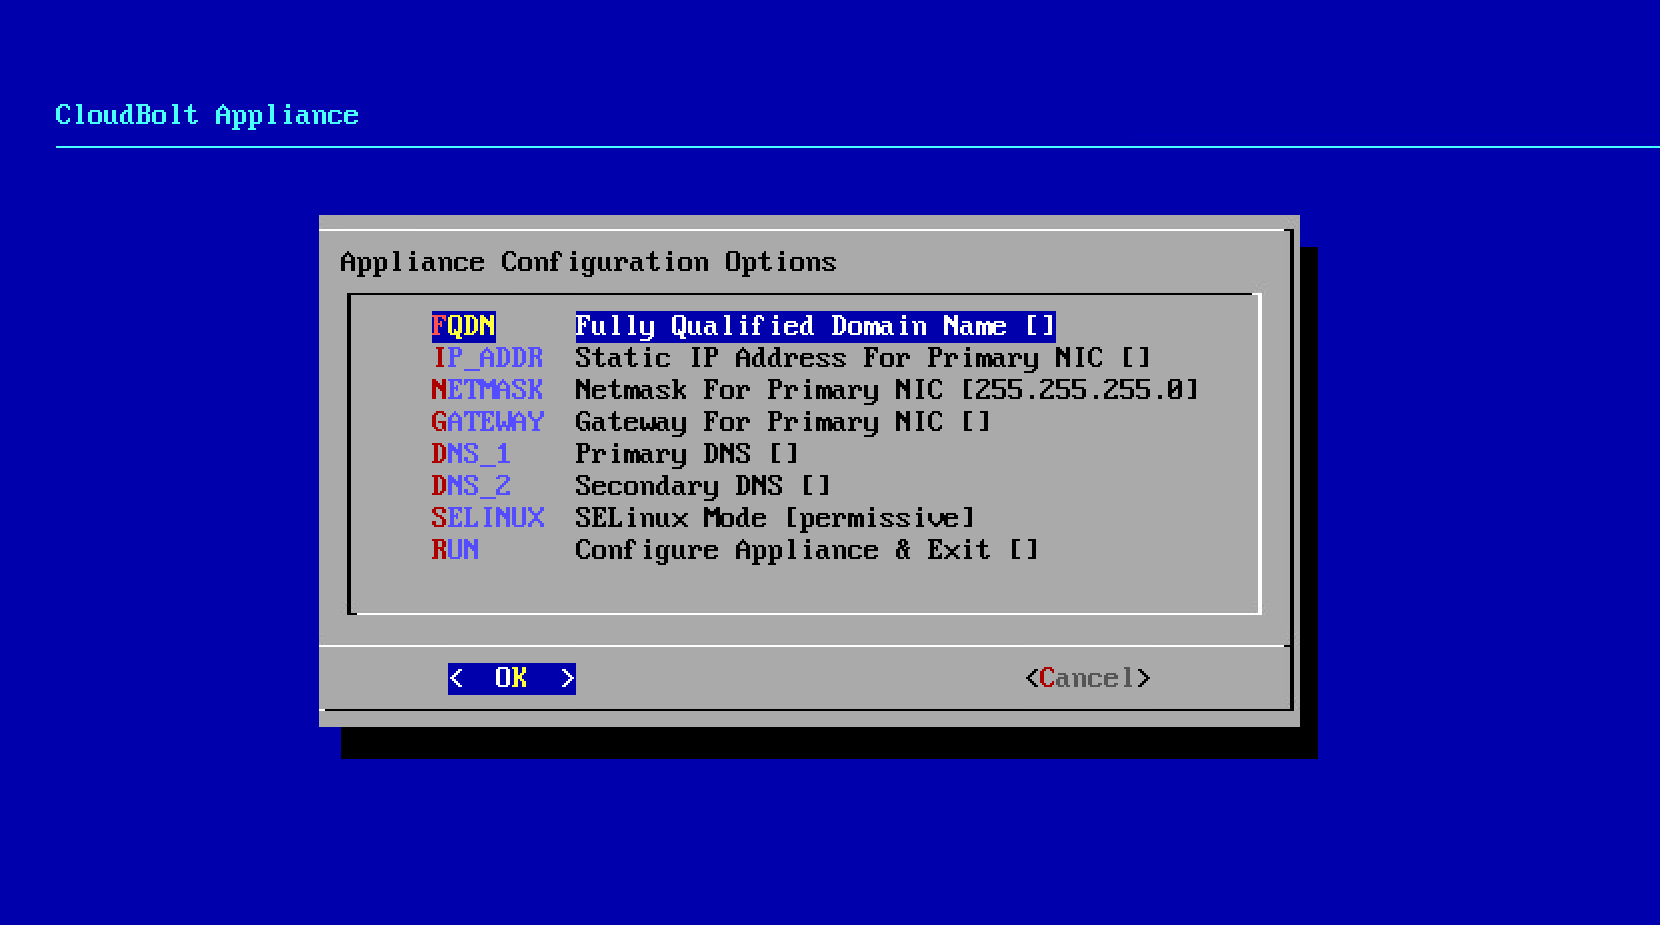
Configure the VM’s Network Settings.
- The VM will prompt you for network configuration information.
- Set the Fully Qualified Domain Name (FQDN)
- Press the
ENTERkey to set the FQDN. - Press the
ENTERkey to accept.
- Press the
- Set the IP Address
- Use the arrow keys to navigate down to Set IP address and press the
ENTERkey. - Confirm the IP Address
- Press the
ENTERkey to accept.
- Use the arrow keys to navigate down to Set IP address and press the
- Repeat for Gateway, Primary DNS, Secondary DNS and SELinux Mode (default is permissive).
- Set the Fully Qualified Domain Name (FQDN)
- The VM will prompt you for network configuration information.
-
Use the arrow keys to navigate down to
RUN -
Press the
ENTERkey to Configure the Appliance -
The appliance will configure and start services.
-
When prompted, enter the new root password.
Assign SSL certificates (optional)
OneFuse ships with Day 0 self-signed SSL certificates.
They are not trusted by your users’ web browsers unless the user makes an exception to trust the certificate.
Configure OneFuse to use trusted certificates that you have issued:
-
Log in to the OneFuse VM console.
-
Copy your PEM-formatted SSL certificate to
/etc/pki/tls/certs/localhost.crt -
Copy your PEM-formatted SSL key to
/etc/pki/tls/private/localhost.key -
Set the file permissions with the following commands:
chown apache:apache /etc/pki/tls/certs/localhost.crt /etc/pki/tls/private/localhost.key chmod 400 /etc/pki/tls/certs/localhost.crt /etc/pki/tls/private/localhost.key -
Restart the web server by executing command:
service httpd restart
FAQs
Can I configure OneFuse to use SELinux
SELinux configuration is not supported.
Can I configure OneFuse for high availability
High Availability configuration is supported. See High availability in OneFuse.
Can I configure OneFuse for non-SSL
Non-SSL is not supported.
Next steps
You are ready to Setup and license OneFuse.