# Set up Kubernetes cost allocation
> Connect your cloud billing data and enable cost metrics on your clusters so Kubernetes spend is attributed to namespaces and workloads
---
Site [llms.txt](/llms.txt)
---
## How Kubernetes cost allocation works
Your cloud provider bills you for the nodes, disks, and network traffic behind a cluster, without specifying which namespace or workload used that capacity. CloudBolt combines two sources of data to close that gap:
- **Cloud billing data:** A FOCUS cost and usage export from each cloud provider, which tells CloudBolt what your cluster infrastructure costs.
- **Cluster usage metrics:** CPU, memory, and network metrics collected in-cluster by the **StormForge Agent**, showing CloudBolt how capacity was consumed by each namespace, workload, pod, and container.
CloudBolt joins the two and attributes infrastructure cost down to the workload level, including idle and overhead capacity. The result is shown in the [Kubernetes Report](/docs/cbp/navigating-the-platform/kubernetes-report/) and the **Kubernetes cost allocation** dataset in [Cost Explorer](/docs/cbp/navigating-the-platform/cost-explorer/).
The StormForge Agent is part of CloudBolt's Kubernetes optimization capability. Without it on a cluster, that cluster's node spend cannot be broken down by namespace or workload.
## Prerequisites
Before you begin, ensure the following:
- Your clusters run on a cloud provider that CloudBolt can collect billing data from: **AWS**, **Azure**, or **GCP**.
- The **StormForge Agent** is installed on each cluster you want cost data for, and the cluster appears on the **Clusters** page in StormForge. See [Basic installation](https://docs.stormforge.io/docs/installation/install/) in the StormForge documentation.
- The Agent is at **version 2.25 or later**. Cost metrics are supported on both the v2 and v3 charts, so at 2.25 or later you do not need to change versions.
- You have permission to run `helm upgrade` against the StormForge release in each cluster.
- The Agent watches the whole cluster. Cost allocation cannot calculate unallocated cost from a partial view, so `enableCostMetrics` cannot be combined with `clusterAgent.allowNamespaces` or `clusterAgent.denyNamespaces` (named `workload.allowNamespaces` and `workload.denyNamespaces` in the v2 Agent).
Do not upgrade from v2 to v3 as part of this task
The v3 Agent replaces the separate `stormforge-agent` and `stormforge-applier` charts with a single unified `stormforge` chart. Moving to it is a migration, not an in-place upgrade: it converts your values, reinstalls the release, transfers CRD ownership, and involves brief downtime. Enabling cost metrics does not require v3. To move to v3, plan it separately and follow [Migrate v2 to v3](https://docs.stormforge.io/docs/installation/migration/) in the StormForge documentation.
The link between your StormForge clusters and your CloudBolt organization is established by CloudBolt when your tenant is provisioned. If your clusters are healthy in StormForge but do not appear in CloudBolt, [contact CloudBolt Support](https://support.cloudbolt.io/cloudbolt/s/).
## Step 1: Connect your cloud providers
Set up a FOCUS cost and usage export for each cloud provider running your clusters. Connect the account or subscription billed for your cluster nodes, usually the management or payer account in a multi-account setup.
1. Log in to the CloudBolt Platform. The address depends on where your organization's tenant is hosted; see [Sign in](/docs/cbp/getting-started/#sign-in).
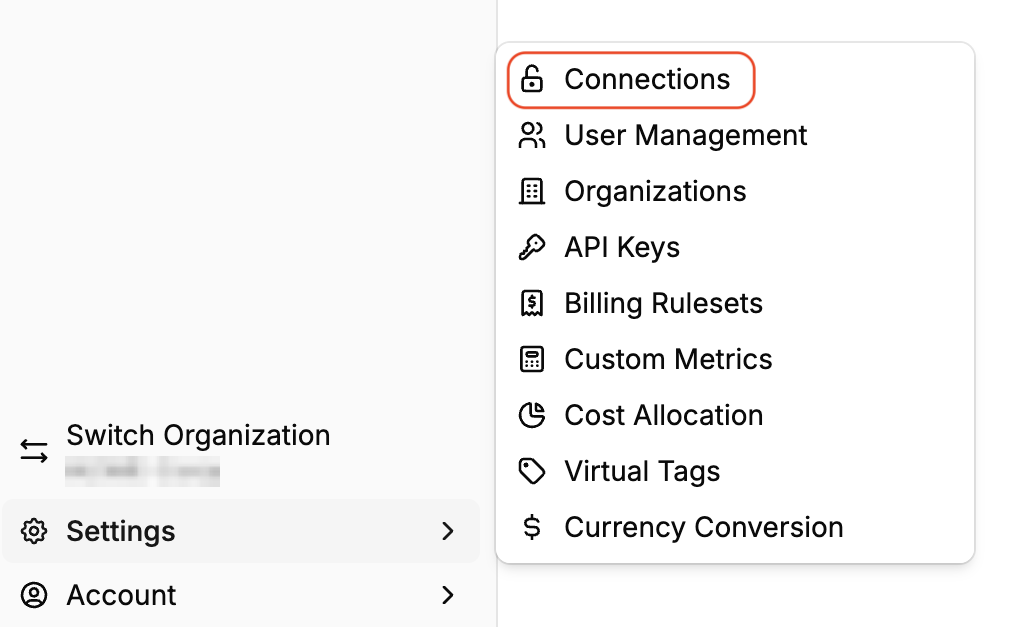
1. Go to **Settings** > **Connections**.
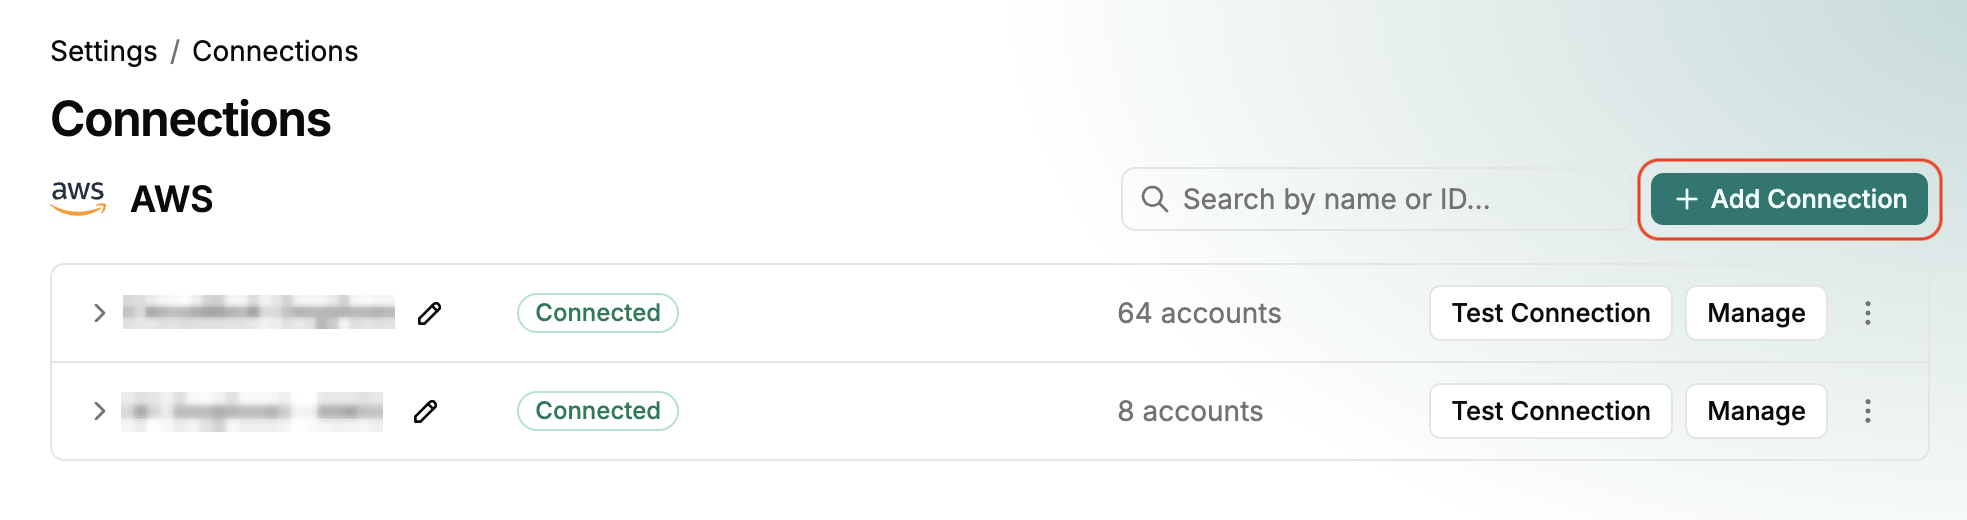
1. Next to the target provider, select **Add connection**, then follow the instructions.
Each provider has its own preparation and connection process:
- [Connect AWS](/docs/cbp/getting-started/connect-cloud-accounts/aws/)
- [Connect Azure](/docs/cbp/getting-started/connect-cloud-accounts/azure/)
- [Connect GCP](/docs/cbp/getting-started/connect-cloud-accounts/gcp/)
## Step 2: Enable cost metrics on your clusters
Cost metric collection is disabled by default. Enable it with the `enableCostMetrics` Helm value on each cluster. Helm applies configuration changes by upgrading the release, so `helm upgrade` is the command you use even when the version stays the same.
### Review the current release
Confirm the release name and Agent version, then store a copy of the current values before making any changes:
```bash
helm list -n stormforge-system
helm get values stormforge -n stormforge-system
```
### Enable cost metrics
Add the following to your values file:
```yaml
enableCostMetrics: true
```
Then upgrade the release, reusing your existing values and passing the updated file:
```bash
helm upgrade stormforge oci://registry.stormforge.io/library/stormforge \
-n stormforge-system \
--version YOUR_CURRENT_VERSION \
--reset-then-reuse-values \
-f values.yaml
```
If you do not manage a values file, set the value inline:
```bash
helm upgrade stormforge oci://registry.stormforge.io/library/stormforge \
-n stormforge-system \
--version YOUR_CURRENT_VERSION \
--reset-then-reuse-values \
--set enableCostMetrics=true
```
These examples use the v3 release name and chart. Substitute the values `helm list` reports if yours differ. Pin `--version` to the version you are running: omitting it resolves to the latest published chart and changes the Agent version too.
### Verify the Agent configuration
1. Confirm the value is applied:
```bash
helm get values stormforge -n stormforge-system
```
1. Confirm the pods restarted cleanly:
```bash
kubectl get pods -n stormforge-system
```
1. In StormForge, check that the cluster still reports as connected on the **Clusters** page.
Repeat this step for every cluster you want cost data for.
## Step 3: Verify data in CloudBolt
Kubernetes cost allocation needs both cloud billing data and cluster metrics before it can report anything, so allow time for the first export and the first metrics to arrive.
1. Log in to the CloudBolt Platform.
1. In the sidebar, select **Kubernetes Report**.
1. Confirm your clusters appear in the **Cost Breakdown** card, then drill into a cluster to check that namespaces and workloads are listed.
See [Kubernetes Report](/docs/cbp/navigating-the-platform/kubernetes-report/) for how to filter, group, and drill into the data, and for how idle and overhead capacity is allocated.
## Troubleshooting
| Problem | Solution |
| --- | --- |
| The Helm upgrade fails with a message about `enableCostMetrics` being mutually exclusive | The release still sets a namespace allow-or-deny list. Nothing was applied to the cluster. Remove the values named in the prerequisites, then upgrade again. |
| The Helm upgrade fails with `invalid ownership metadata` on a CRD | The command resolved the v3 chart. Re-run it with `--version` pinned. To move to v3 deliberately, follow [Migrate v2 to v3](https://docs.stormforge.io/docs/installation/migration/) instead. |
| No clusters appear in Kubernetes Report | Check that the cloud provider connection is healthy in **Settings** > **Connections**, and that the cluster reports as connected in StormForge with `enableCostMetrics` set to `true`. |
| A cluster appears, but its namespaces and workloads do not | The infrastructure cost has arrived, but the cluster metrics have not. Confirm the Agent is version 2.25 or later, that `enableCostMetrics` is applied, and that the pods in `stormforge-system` are running. |
| Some clusters report namespace costs, and others do not | `enableCostMetrics` is set per cluster. Repeat [step 2](#step-2-enable-cost-metrics-on-your-clusters) on each cluster. |
| Cost appears under **IDLE** or **OVERHEAD** rather than against your teams | This is expected: it is capacity the cluster paid for but did not hand to a workload. To spread it across your namespaces instead, enable **Distribute idle & overhead costs** in the **Cost Allocation** filter section of the Kubernetes Report. |
[Contact CloudBolt Support](https://support.cloudbolt.io/cloudbolt/s/) if you would like help setting this up.
## Related topics
- [Kubernetes Report](/docs/cbp/navigating-the-platform/kubernetes-report/)
- [Connections](/docs/cbp/navigating-the-platform/settings/connections/)
- [Cost Explorer](/docs/cbp/navigating-the-platform/cost-explorer/)